
This week’s Saturday Technique post is really a whole suite of techniques — sweet, eh? From time to time I teach a one-day workshop called “Watercolour Special Effects Magic”. It’s one of my very favourite workshops to teach, because it is all about playing with the medium. We don’t try to make pictures (although some pictures do inevitably emerge) — the goal is to play with the paints and learn what can be done with them. The textures, tricks, and techniques below have a huge variety of uses — I’ll add some illustrations for some of them, but try them yourself and see where they take you!
Special effects are great to have in your technique toolbox whether you are a beginner or more experienced. A word of caution, though: don’t let them take over your painting! Too much of any one of these can make your painting look gimmicky — but use them where they are called for and they can be as valuable as your brushes. I’ve included some suggestions for use based on what I use them for, but don’t be limited by these — invent your own uses!
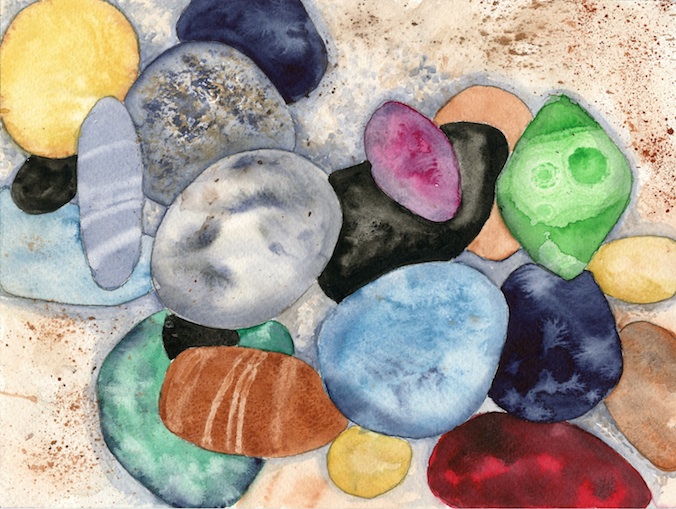
“Rainbow Pebbles” — many of the techniques described here are used in this painting, including salt, alcohol, spattering, sponge printing, lifting, and backwash
But First — A Bit About Watercolours
Watercolour paints are pigments dispersed in a binder of gum arabic, along with other ingredients such as sugar or honey water for a plasticizer, glycerin to keep the paint moist, a wetting agent such as oxgall (or a modern synthetic counterpart) to obtain a uniform flow of paint, and a preservative such as phenol. Different manufacturers use different formulas, resulting in different looks and handling characteristics, even for pigments of the same name.
The effectiveness of your special effects begin with your paints. Watercolours have various qualities depending on the pigments used. You can learn about them in detail from books and manufacturers charts, but for now, suffice it to say that:
• watercolours come in various states of transparency or opaqueness
• some are staining, instantly bonding permanently with the paper fibres, while others, non- staining, can be lifted back off of the paper until it is white again
• and some are granulating or floculating (two slightly different effects), resulting in a slight texture to the wash as it dries.
While it is good to know these qualities intellectually, so that you will know what to expect from any given paint, the best way to learn about your watercolour pigments is through experience and observation, armed with the knowledge of what the possibilities are. So paint, paint, paint! Make colour charts, make special effects charts, make experiments, make notes as if you were a scientist. But have fun playing, too!
Printing effects:
sponges, paper towels, rags — sea sponges, cosmetic sponges, ordinary kitchen sponges, wadded up paper towels and rags can be the answer when you need a random, mottled look. Try layering colours on dry paper, possibly over a smooth or graded wash, for a natural look on rocks, distant trees, forest floors. Your sponge can be wet or dry when you pick up the paint; wet will give a softer effect. You can even use this technique wet-on-wet (or slighly damp, anyway), but with softer results. Use as a base layer for wood or rust, putting in details with a brush.
plastic wrap, waxed paper, aluminum foil, bubble wrap, string — lay these wadded loosely or tightly on a section of wash while it is freshly wet, and let them dry in place (very important!). Great for random textures that can be enhanced or added to with brushes or other texture techniques; aluminum foil can be folded first for more geometric shapes and the bubble wrap makes rows of bubbles, and string of course makes lines.

a saran wrap texture — in this case, the wrap was stretched directionally.

“Haunted River” — painted over a saran-wrap texture
leaves, vegetables, cloth. buttons, mat board, erasers, and other objects — anything that you can dip into paint or paint with your brush and then stamp onto your paper. Experiment with different paint thicknesses. Good for repeated textures, or as one-off motifs.
wadded paper — dip or paint on wadded up crisp paper to print interesting organic textures.
Chemical interactions:
Salt — attracts water to itself, and when applied to a wet watercolour wash, attracts both the water and the pigment from the area surrounding each grain, resulting in beautiful star or snowflake-like effects. This is good for, well, stars and snowflakes, but is also useful for lichen on rocks and trees, leaves in the middle distance, and when you just want to add some interest to a plain background area. Use regular table salt or sea salt in fine powdered form or large chunks. Let it dry completely before removing the salt from your painting.
Considerations when using salt:
• The wetness of the wash is important: it shouldn’t be too watery or the salt will not be able to cope with all the moisture; it shouldn’t be too dry or the salt will have no effect.
• Pigment saturation is important: the wash must be more heavily pigmented than if you were not using salt, because the salt will absorb some of it. But if you put too much pigment in the wash it will be too dry, and the salt will not be able to do its work.
• The salt will react differently in different pigments; make a sampler to discover what it does with your colours.
• If you want to soften the effect, you can paint over it.
• You cannot re-wet a failed salt wash and re-apply salt. It just makes a mess and refuses to do the salt thing anyway.

“Night Lights” — the background nebula-like blooms of sky colour are salt; the individual stars are dots of white ink.
alcohol — drops of alcohol form a dot with a ring of pigment around it, pushed out of the way by the alcohol. The size of the dot depends on the size of the droplet. This is kind of a weird effect, but fun — I’ll leave it up to your imagination what to do with it. You can also paint it into a wet wash with a brush for some more weird effects (see the bright blue rock at the top of the painting below). Use regular rubbing alcohol, not the good rum!

pebble sampler — I make samplers of many of the techniques during class, using pebble shapes. The blue one and the black one are salt, the golden one at the bottom right is alcohol. The dark red one in the bottom right is a backwash drip — compare the effect with the salt. The “sandy” background is spattering with a toothbrush, having protected the stones with some paper scraps.
Physical Interactions:
spattering — use an old toothbrush to make a fine spatter or spray of paint. This can be used with a mask of paper or tape in the manner of an airbrush, and is lovely for achieving fine impressionistic gradations. Try layering colours in your spatters for more depth. Good for rocks, sand, anything gritty, and conversely, smooth soft things like fur or velvet.
dripping — try dripping water onto a dry or almost-dry wash. The backwashes and tendrils caused by this can make effects similar to salt — a good substitute when you only have your bare-minimum travel kit!

“Long Beach Sketch” — the backwashes created by dripping water into a wet wash created the clouds and the misty effects in the rocks on the right. The sand has some spattering from a toothbrush on it.
spraying or spritzing — like dripping only more so. Can also be used in conjunction with tilting the paper to move paint around the paper in an initial toning wash.
blowing — drop a pool of cream-consistency watercolour on bare paper or on top of a wash; use a soda straw to blow it into fantastic patterns. Good for bare branches, or layer it with different colours of pale paint to form an interesting background. Kids of all ages love this one!

an unfinished demo painting where I showed negative painting and blowing paint (the black branch in the lower left).
dry-brush — not quite as it sounds: the paint on the brush is just not very wet. Use this not-very-wet brush to create furry or hairy textures; it can even be crosshatched. Good for grass, fur, hair, linear texturing. Try different brushes for this, including old brushes, bristle brushes, and specialty brushes such as fan and stencil brushes.
Paper abuse: scraping, scratching, sanding
you can scrape, scratch, or sand away painted surfaces for texture, or you can do these things before you paint to roughen up the paper, resulting in more colour absorption in the damaged fibres. Be sure your paper can take it — some papers stand up to this sort of thing better than others.
Indenting
try indenting your paper with pointy tools such as bamboo pens, toothpicks, the other end of your brushes, dead ballpoint pens, knives, forks, chopsticks, or combs for very fine parallel lines. If you brush over with a fairly dry brush, these lines will remain white. If you brush over with a wet brush, colour will pool in the lines. You can indent your paper when it is wet or when it is dry, before or after it is painted, for different effects.
Lifting effects:
brushes, paper towels, sponges, and rags can be used to blot away colour, either used dry right away from a wet wash, or used wet for a wash that has dried. These can create clouds and shading effects. Brushes can be used to create white lines instead of painted lines by using clear water and then blotting a bit if necessary. Keep in mind that some paints stain the paper more than others, and you might not be able to get back to a clear white; if it is important, test the colour and its lifting properties on scrap paper first.

“Storm Building” — I used a paper towel to lift colour out of a solid sky wash for the clouds, then dripped in a bit of grey, then more water for the backwashes.
Resist and masking techniques
masking fluid — this stuff is a cousin of rubber cement. It comes in white and coloured forms; the coloured ones are easier to see but make it harder to visualize what you are painting. There are both brush-on varieties, and my favorite, one that comes with an applicator squeeze-tip for greater control. If you use the brush-on kind, don’t use your good brushes. Really! And rub soap into the bristles beforehand or you won’t be able to get it off at all. Be sure to get it off of your painting promptly, or it can be difficult to remove. You can paint over areas that you have previously masked and removed, making intricate layering of colours possible.

“Winter Tree” — a Christmas card I did for a friend; the white was all masked off with masking fluid, after which I could paint freely, knowing all that lovely snow would be preserved in pristine white paper.
crayons, oil pastels, and wax candles — used in white or colourless forms to reserve the white of the paper. They cannot be removed as masking fluid can, so be sure you want that area to be white! Just draw on the paper with them — you may have to tilt your head sideways to be able to see them as you draw. A variation on this is to use coloured crayons or oil pastels to create coloured paint-resistant lines.

“Looking South” — an example of oil pastel resist. I made a loose drawing in white and coloured oil pastels, leaving lots of space between lines, and then flooded the paper with magenta watercolour. The oil pastel resisted the watercolour, so it wasn’t coloured over. The rough texture of the paper gives the lines a sparkly, impressionistic effect.
masking tape and sticky shelf paper — used to mask off larger areas very precisely. They are a bit fiddly to cut to shape (unless you are going for the randomly-torn look), but worth the effort for clean-cut edges. Try laying the tape onto a self-healing mat and cutting your shape out with a mat knife; for large shapes, use shelf paper or place tape strips overlapping slightly edge to edge. Use the green or blue painter’s tape for greater ease of removal; the shelf paper is also easy to remove, but has greater danger of leaking. It’s best for spatter masks. Lightly burnish the edges so that paint doesn’t leak underneath, but not too hard or the tape might remove paper when you pull it up.
white glue — squeeze on white glue to leave a raised, shiny line. The glue dries clear, so you can use it to preserve a white line, or use it over an already painted section. You can also paint thin coats of it over areas you want to resist subsequent washes of colour. Remember that the glue will become a permanent part of your picture. You can also use acrylic mediums for this technique: gel mediums for a thick effect, mat or gloss mediums for thin coverage. This makes a really nice faux-silk painting effect. With layers of thin glue or medium you can make a batik-like effect.
Mixing Media
Watercolour combines brilliantly with other media. Used for a base colour, you can overlay coloured pencils, watercolour pencils, inks (both black and coloured), acrylics, collage, pastels, oil pastels, charcoal… imagine the possibilities with any medium. (in the workshop, we play with the following two techniques)
India Ink — Why not just use black watercolour? Because it behaves differently than india ink. India ink’s formulation reacts with wet watercolour washes with a delightfully feathery or mossy effect, making it useful for all kinds of organic effects. Coloured inks will also do this, but check the manufacturer’s specifications for permanence of any given ink colour.

India ink drawn into a watercolour wash. It spread differently than watercolour would, having a heavy, oily nature due to the lacquer in it. There is also a nice backwash and some accidental salt in this one!
Collage — Collage and watercolour are a natural. I always save my paintings that don’t work out for use in collages, sometimes tearing them at random, and sometimes cutting out specific parts. There is another way to use collage technique with watercolour, however, and that is to do the watercolour on top of the collage. Glue white tissue paper, rice paper, or any textured paper onto your support with white glue or acrylic medium. You can crumple the paper and smooth it out, You can add natural materials or fabric such as cheesecloth as well. Let the glue dry, then paint on it with watercolour. You can also collage translucent papers and cloth over watercolour for a veiled effect.

This funky chicken was a quick demo to show students that tearing up their paintings could be fun. It’s not a masterpiece, but it does have a certain… something.
I like to see how different techniques combine just for fun. Here’s one last grand finale demo painting with blowing, salt added to the blowing, alcohol drips, alcohol drips with salt dropped into the alcohol,salt dropped over the blown part… well, I haven’t blown myself up yet, so I’ll just keep on wizarding!
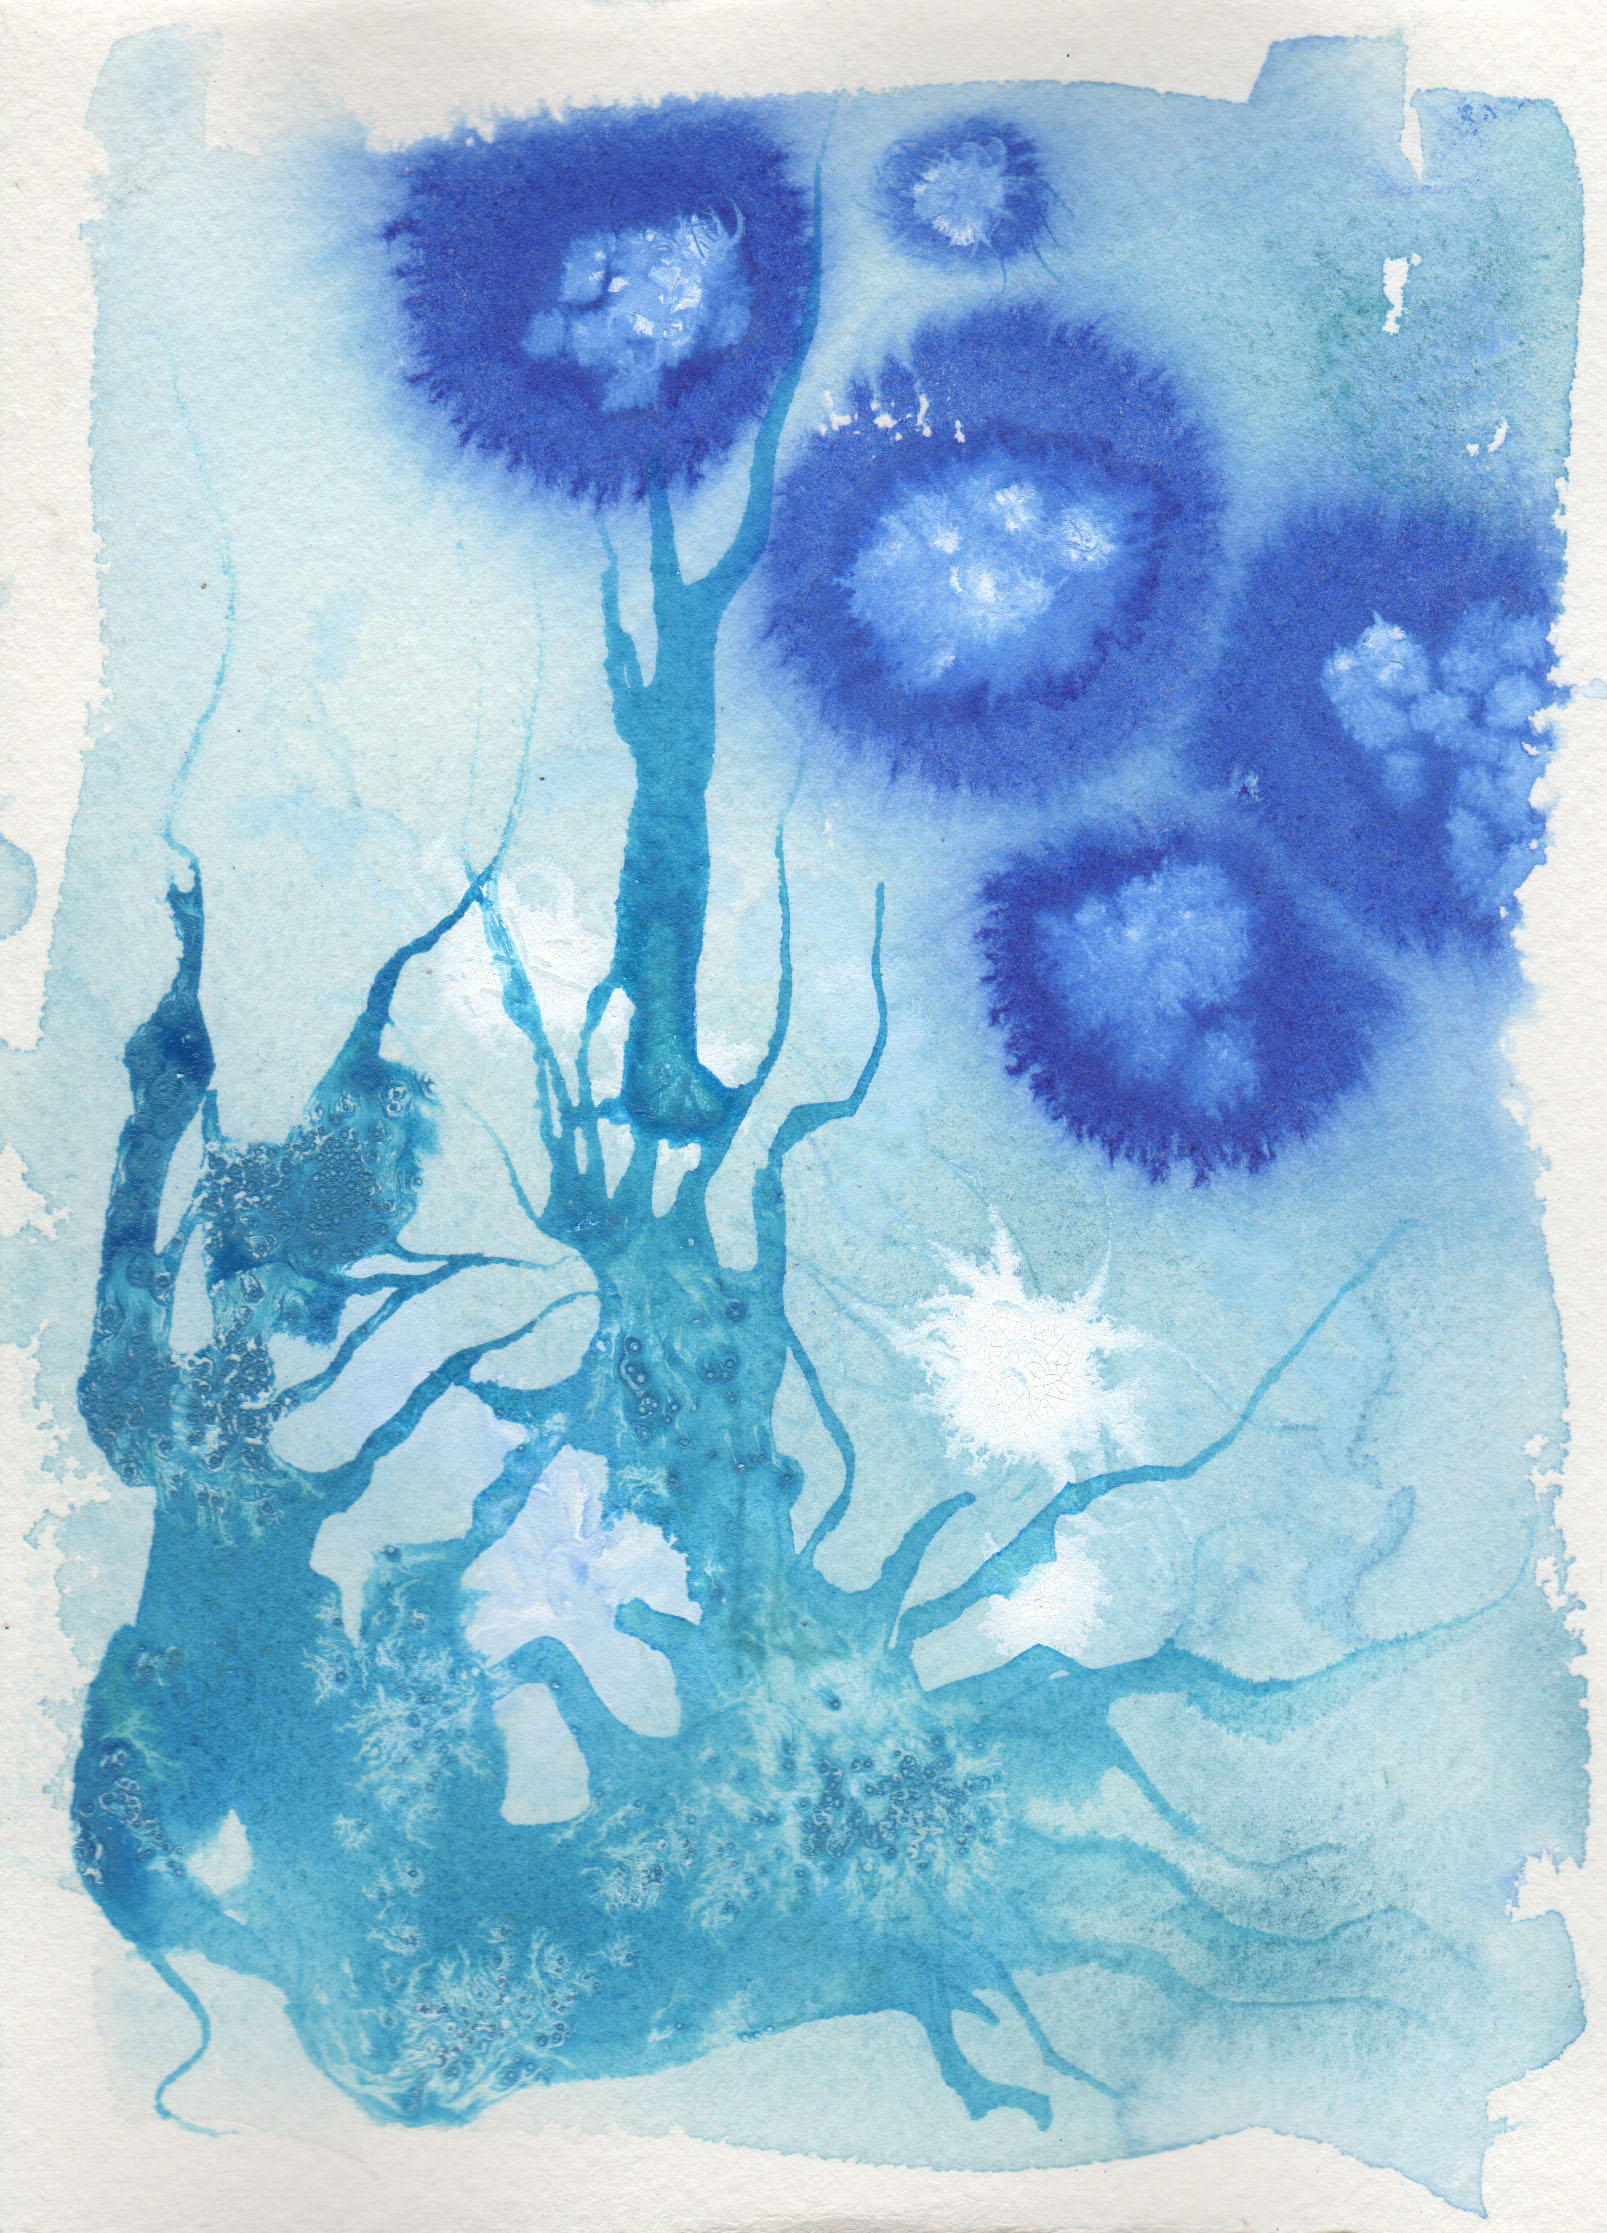
“Alien Invasion” — or maybe it’s a party!
© Karen Gillmore 2014

I reallly love the “rainbow pebbles” image, but all of them are wonderful!
LikeLike
Thank you, Meg!
LikeLike
Pingback: Technique-of-the-Week — Demystifying Watercolour Paints | Karen Gillmore Art·
this is just terrific and I will save this for later…….all of these will be applicable to fabric painting with the water color pencils!!! thanks tons!!! and passing this on to a friend too! Joan
LikeLike
Hi ..I think you have covered every mixed media one can use with watercolour my wonderfull teacher in Florida has shown me.
I wish your classes were near kew.its great to open up to new possibilities with this media. Toilet paper makes great flowers.
LikeLike
Hi Brenda, I’m glad you enjoyed the post! Oddly, I was just looking at an old Watercolour Magazine today that had an article about someone who taught in Florida, and his paintings made me want to get out all my pictures from my last trip down there and start painting palmetto leaves.
How do you make flowers with toilet paper? Do you mean using it to print textures, or actually sticking it to the paper?
LikeLike
Pingback: Magic Vision — Through Science! | Karen Gillmore Art·
Thank you for this! SO much wonderful info with examples, too, all in one place. It’s so very helpful to see how others present concepts to students since I’ve started teaching recently. 🙂
LikeLike
You’re very welcome, I’m glad it’s useful! I’m also always looking for new ways of explaining things; I teach mostly beginners, who often have very different ways of learning, so it’s important to have a varied bag of teaching tricks.
LikeLike