
The process of making a comic, step-by-step
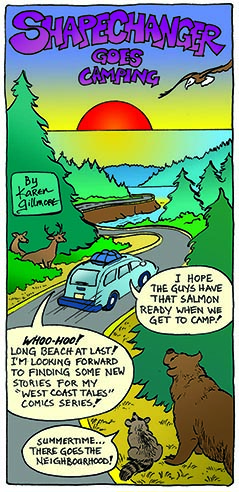
Yesterday I posted a one-page comic that I did as part of a school program, at the beginning of the year, and I promised to post the sequel, so here it is!
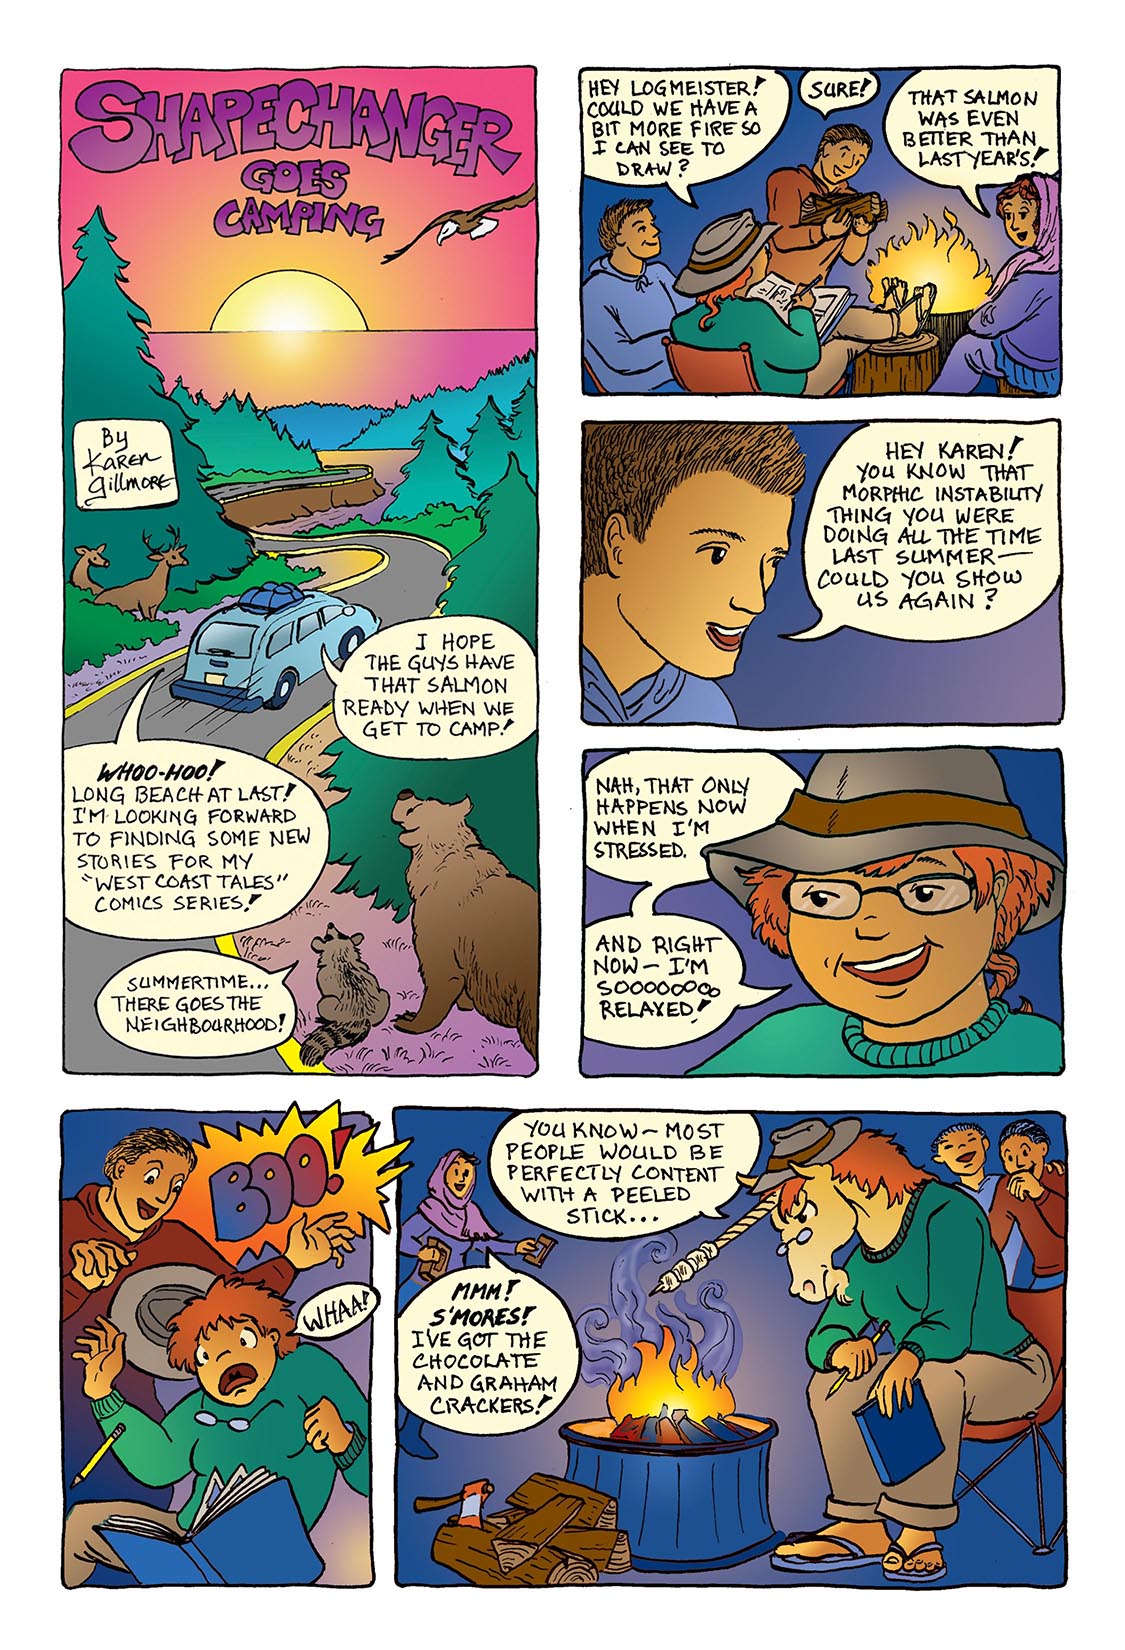
Shapechanger Goes Camping
By the end of the year I had learned a lot about putting a story together (there was also a lot of creative writing as part of the program), and enough about using Photoshop that I was able to make my last comic of the session my first computer-coloured comic. Those of you who are fluent in computer graphics, please don’t laugh too hard! I did this mostly with gradients!
The assignment was to draw a comic about what we planned to do on our upcoming summer vacation (the first one was about our previous vacation). I planned to go camping with my usual crew at Long Beach, the one on Vancouver Island, part of Pacific Rim National Park, my favourite place in the whole world. As it turned out, I went with another friend because I couldn’t schedule at the same time as my other friends, but I had a great time!
I’ve been asked about my process, so I’ll show the different stages it went though. The first step was to do a script (seems a little much for a one-page comic, but it was practice — I really like to have a detailed script for longer work). Then some tiny thumbnail drawings for ideas on how to lay it out. The final comic was drawn full size, first in pencil, then ink, then scanned and coloured in Photoshop, using the very simplest of fill methods. It took me a long time because I still wasn’t quite sure what I was doing, and was learning things along the way. I can computer-colour a lot faster now!

The script. For the longer things I’m working on, I like to have all the dialogue written and the action blocked out before I even do the thumbnails. Not everyone works this way; some people think better visually.

The Thumbnails. These are each about 2×3 inches. My teacher proposed the one on the left, and that’s what I ended up doing. He always comes up with better layouts!
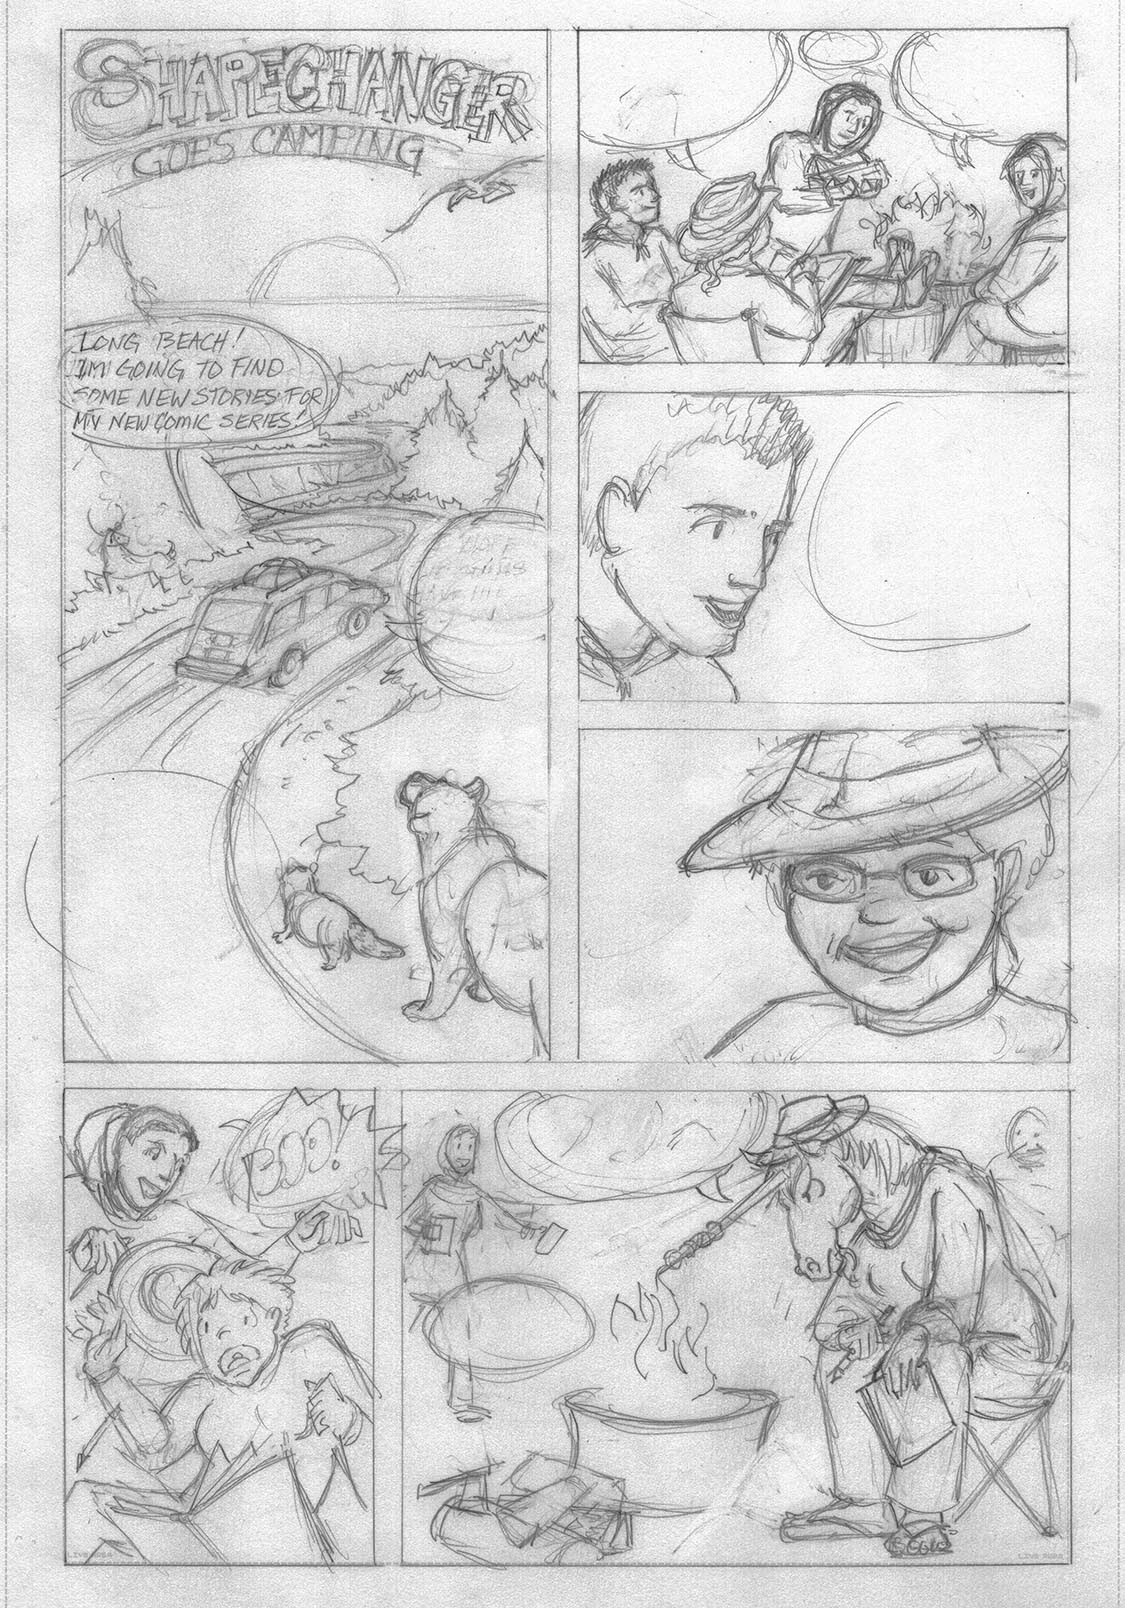
The full-size pencils. I draw by sort of scribbling around until I find the right place for my line. Makes for a pretty smudgy result; it’s why I like to ink it afterwards.

The ink stage. I inked this with Pigma Micron pens, my favourite marker-pens. They come in a bunch of different sizes, have durable tips, last a really long time, and are waterproof and fade proof. After I ink it, I erase the residual pencil lines, of which there are lots, because I’m a very sketchy drawer! I then stop and appreciate the clean paper for a bit. Ahhhh. The lettering was done by hand; I actually really like doing hand-lettering, but for some things I do it on the computer, because it’s faster, and you can move it around. Someday I’ll get a font made of my own handwriting (yes, you can do that!)
The first panel, an out-take. I was pretty proud of myself for getting this far, but I showed it to my teacher, and he said, nonononono, sunsets don’t look like that. Make it all orange and red and yellow and purple. So I did. And then I had to adjust a whole bunch of other colours too.
So that’s the basic process I go through when making a comic. For a longer story, of course, there’s a lot of writing to do first, with all the usual writerly-process stuff to consider, but the steps are the same after I get it written.

Amazing!
LikeLike
Thanks, Shayla!
LikeLike
Thanks for taking the time and describing your process in such detail! Makes me eager to try a wee, tiny. comic myself!
LikeLike
You’re welcome! I hope you do try one — it’s fun! I used to make little comic stories for party invitations — it could be just about any little anecdote, joke, or everyday happening. If you make one, I’d love to see it!
LikeLike
Great comic and great description of the process. 🐴
LikeLike
Thank you, Ilex!
LikeLike
OOOOH I just wanted to give you cuddle! They are a bit mean friends?!
LikeLike
*grin* Actually they are wonderful friends, and are in real life very kind. They just like a bit of horsing around! (uh-oh, a pun!)
LikeLike