

I didn’t forget my drawing challenge today! I’ll have to paint this later, though.
Almost everyone has made a collage at sometime in their lives; often by cutting up pictures from magazines and reassembling them to express a theme or an inspirational message. This is a great way to explore ideas or your inner landscape, but do you know that collage is also a respected painterly medium, used by such famous artists as Picasso and Matisse? Many graphic artists and illustrators also use collage, and there have even been comics done entirely in collage! While I’m not against making magazine collages, there is so much more to it!
Almost any material can be added to a collage, as long as it is able to be glued onto a piece of paper or a board, and can be used to do artistic exploration of a different nature — textures, colours, and composition. I have often put together combinations of colours or textures in a collage that I would never think of using paint, and the radically different way of building a picture leads me to think differently about composition as well, though the same principles apply as would for any painting.
Learning to make collage is largely a matter of doing it; you glue paper and other things together until you have a picture. But it helps to know some practical stuff, and I’m going to list some ideas here about materials and ways to use them.

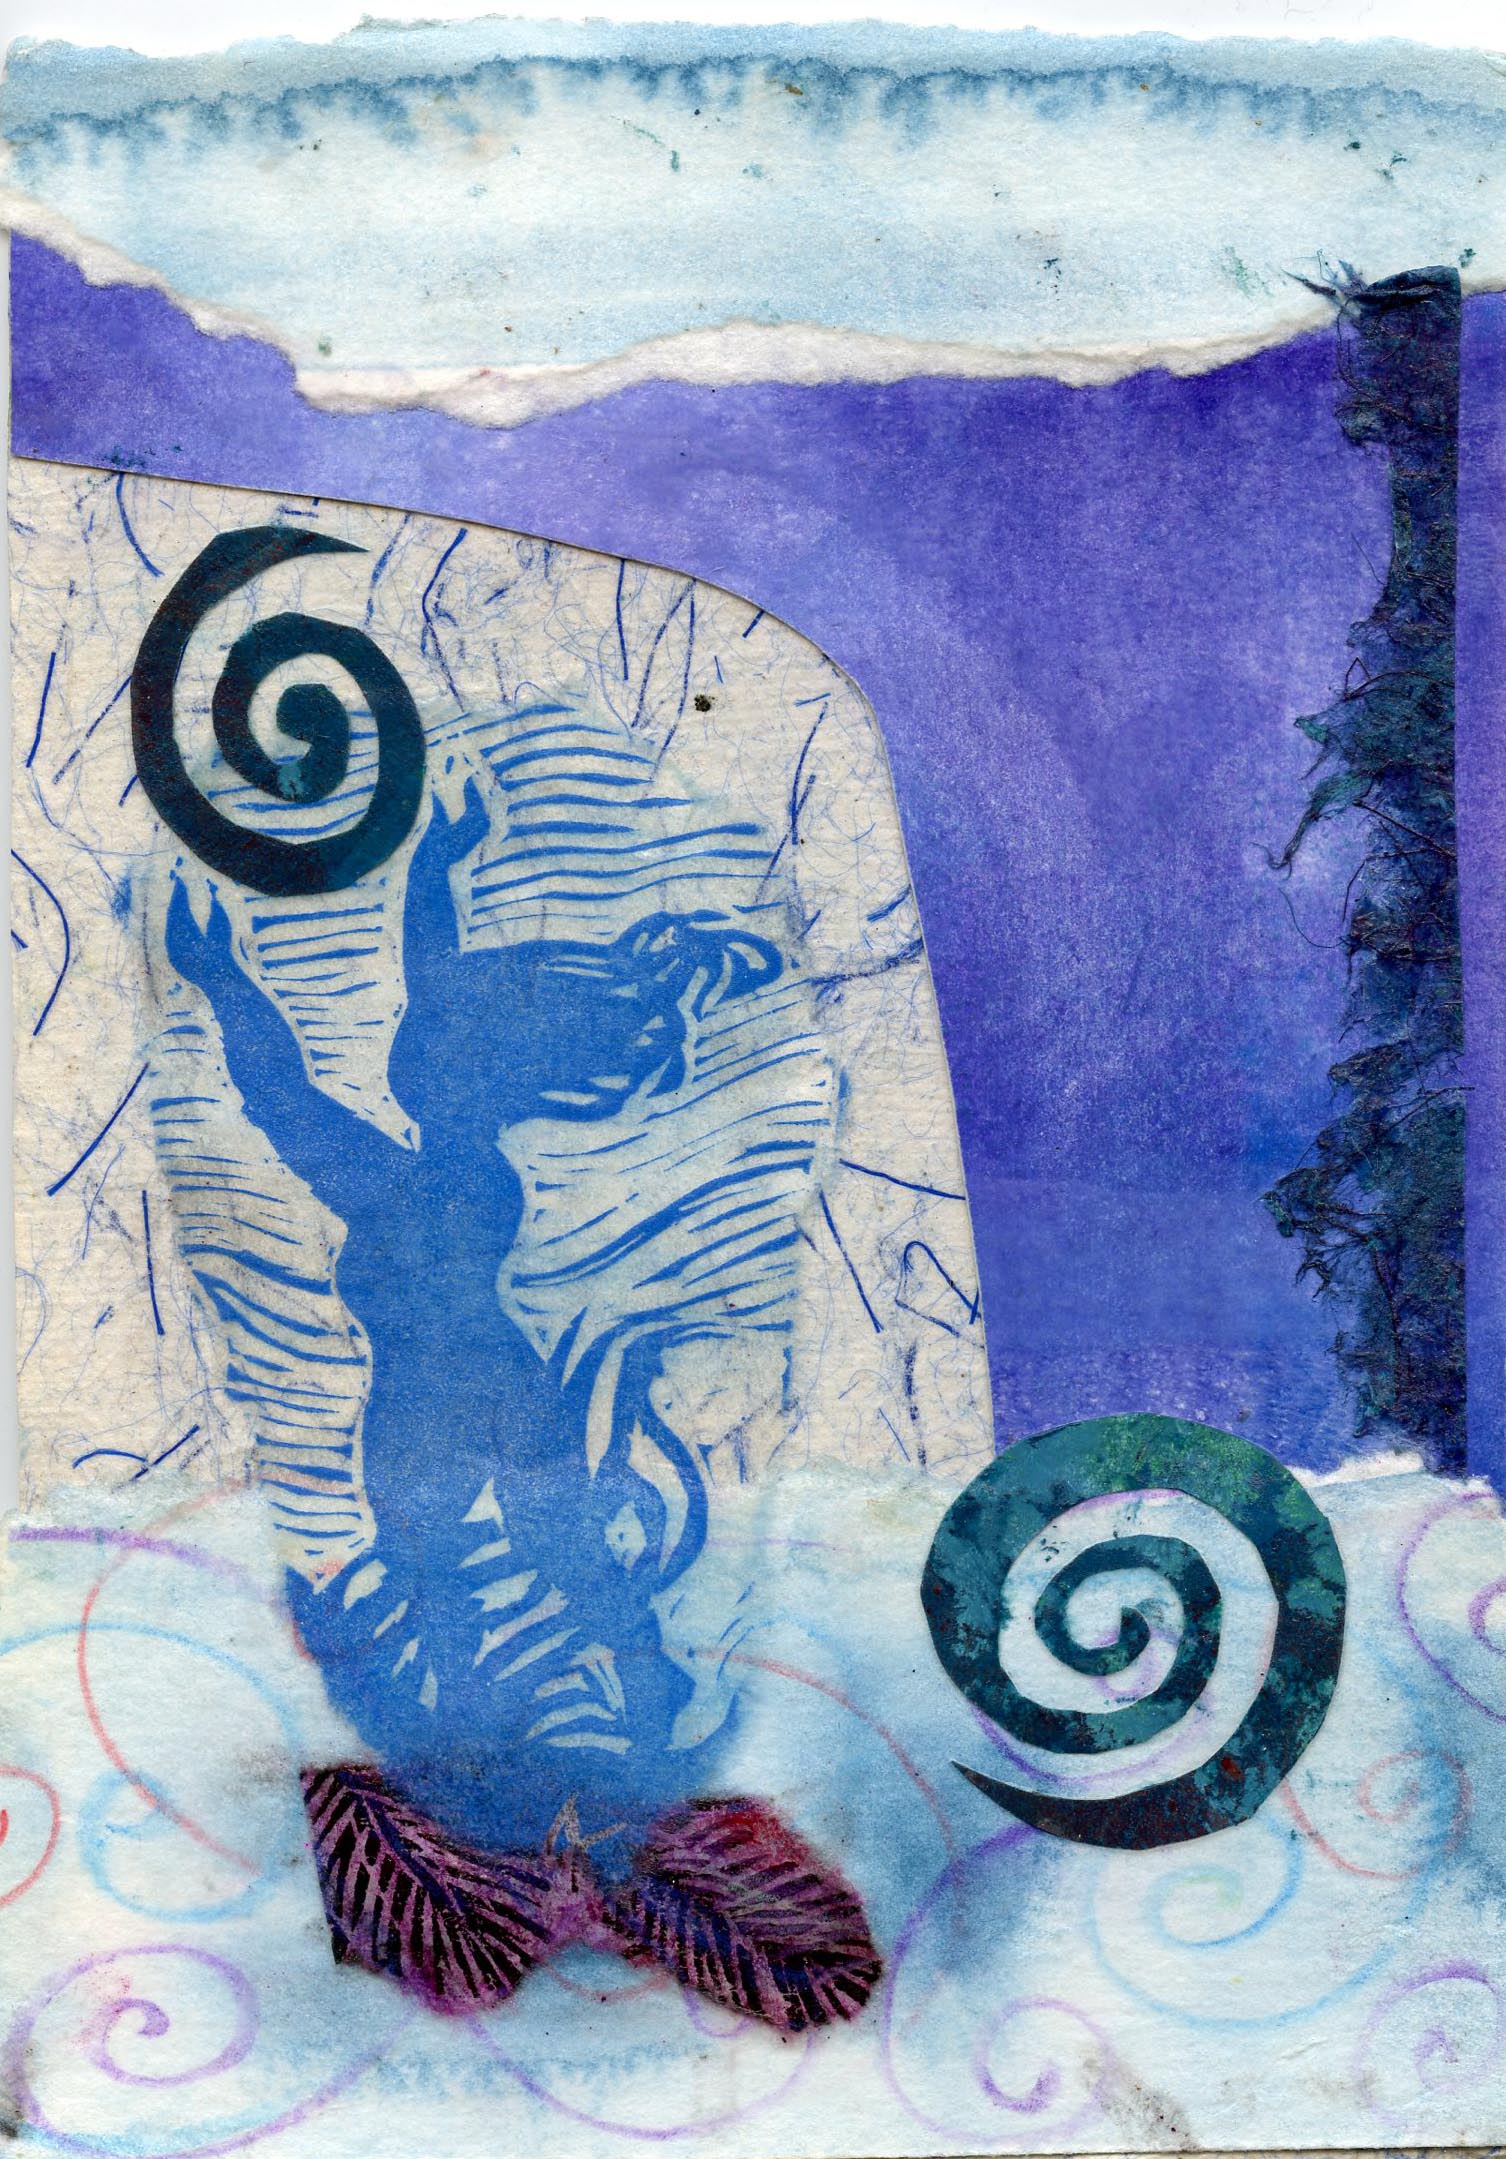
Stone thoughts — hand decorated and printed papers, handmade paper. Spirals are really fun to cut!
Glue: Use quality glue. My favourite is matte acrylic medium, PVA glue (basically fancy white glue) or a good quality white glue such as Weld-Bond. The PVA has the advantage of not making your paper curl; the matte acrylic medium has the advantage of not leaving a shiny sheen on your paper as the PVA or white glue will. However, sometimes I want to just lay down a protective, shiny coat, in which case the other glues are fine. Often I even give a final coat all over the piece with gloss acrylic medium, which really brings out the colours.
Some people prefer flour or rice based pastes, which you can make yourself (numerous recipes exist online) or buy in ready-to-mix form. These are archival, and nice to use, but have one serious disadvantage as far as I’m concerned — mice and bugs love them!
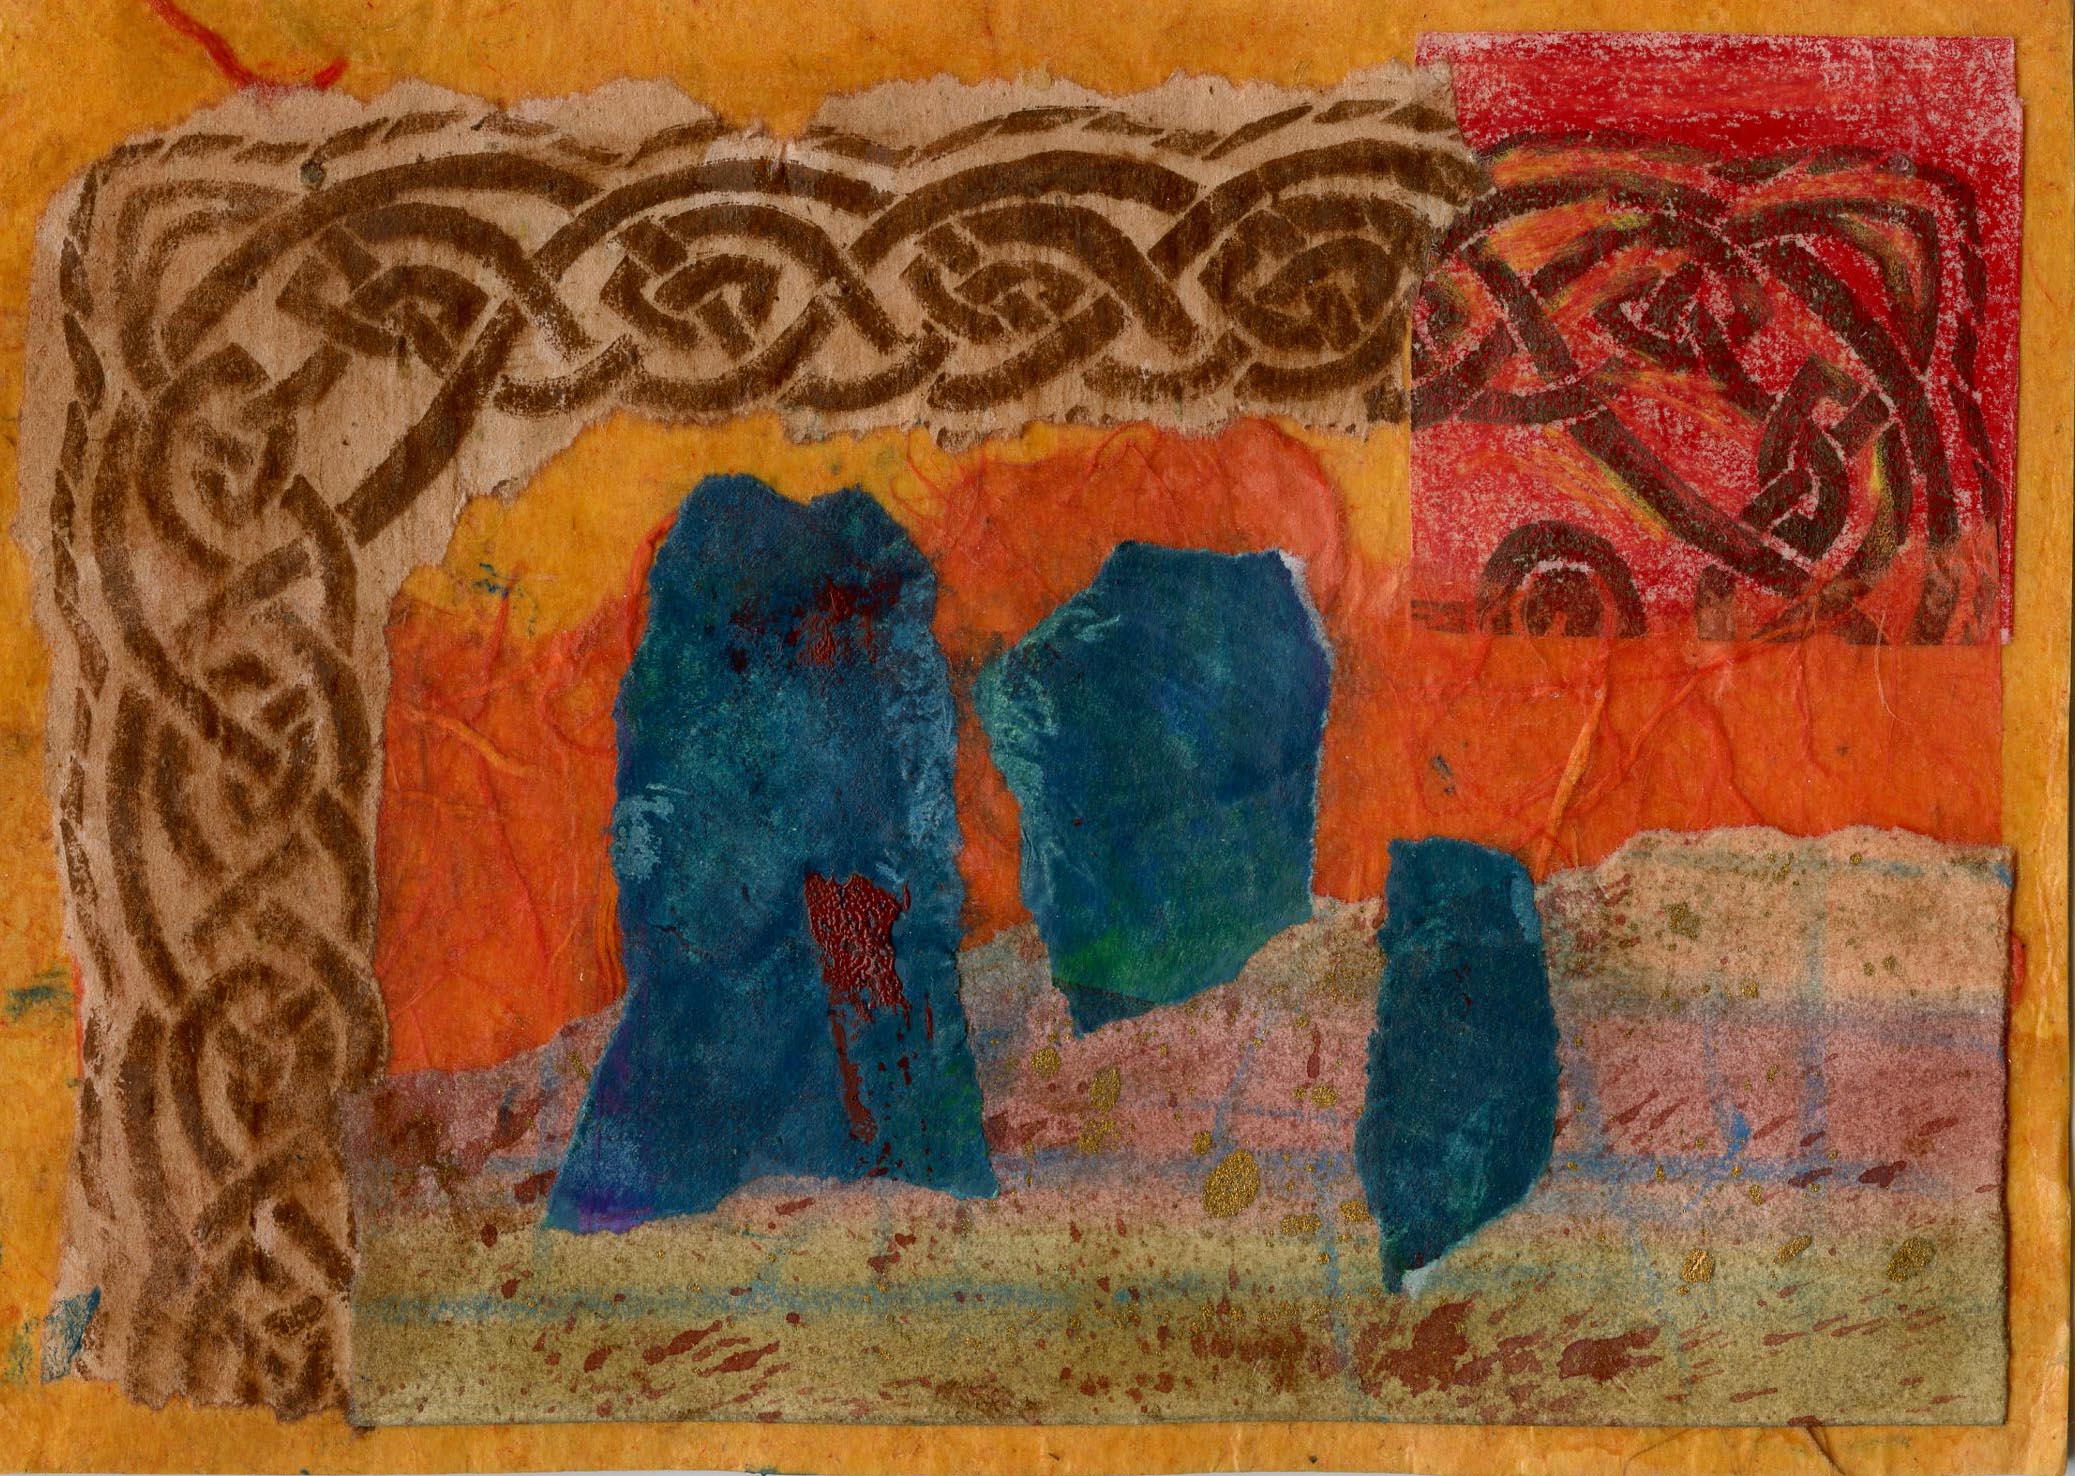
Stone Magic — hand decorated and printed papers, handmade paper
Support: This is the thing you glue the collage bits to. Anything flat that you can glue something onto can be a support. You can even collage 3-d objects such as boxes, chairs, guitar cases, or your car. Here are some types of supports I have used for creating wall-hung pieces of art: card stock, matboard, foam-core, plywood, masonite, and stretched canvas.
Juggle the Light — hand decorated and printed papers, handmade paper
Paper: Now for the fun part! There are so many different kinds of paper. If you are using the acrylic mediums or white glues you don’t even have to worry about archival qualities (basically: how acid-free is it?) because the paper will be coated in plastic, though colour fading due to light is still a consideration. Here’s some paper ideas:
Found papers: old letters, postcards, tickets, fragments you pick up off the street, discards from the blue box, stamps, wrappers, the general paper detritus of our everyday lives — you get the idea. If it looks interesting, collage it!
Exotic and decorated papers: The art stores are full of gorgeous papers, and nowadays you can even get sampler packs of small pieces in many colours. Handmade papers, hand-decorated papers, printed papers, gift wrap papers, Oriental papers; these are all like a treasure box for creating collage.
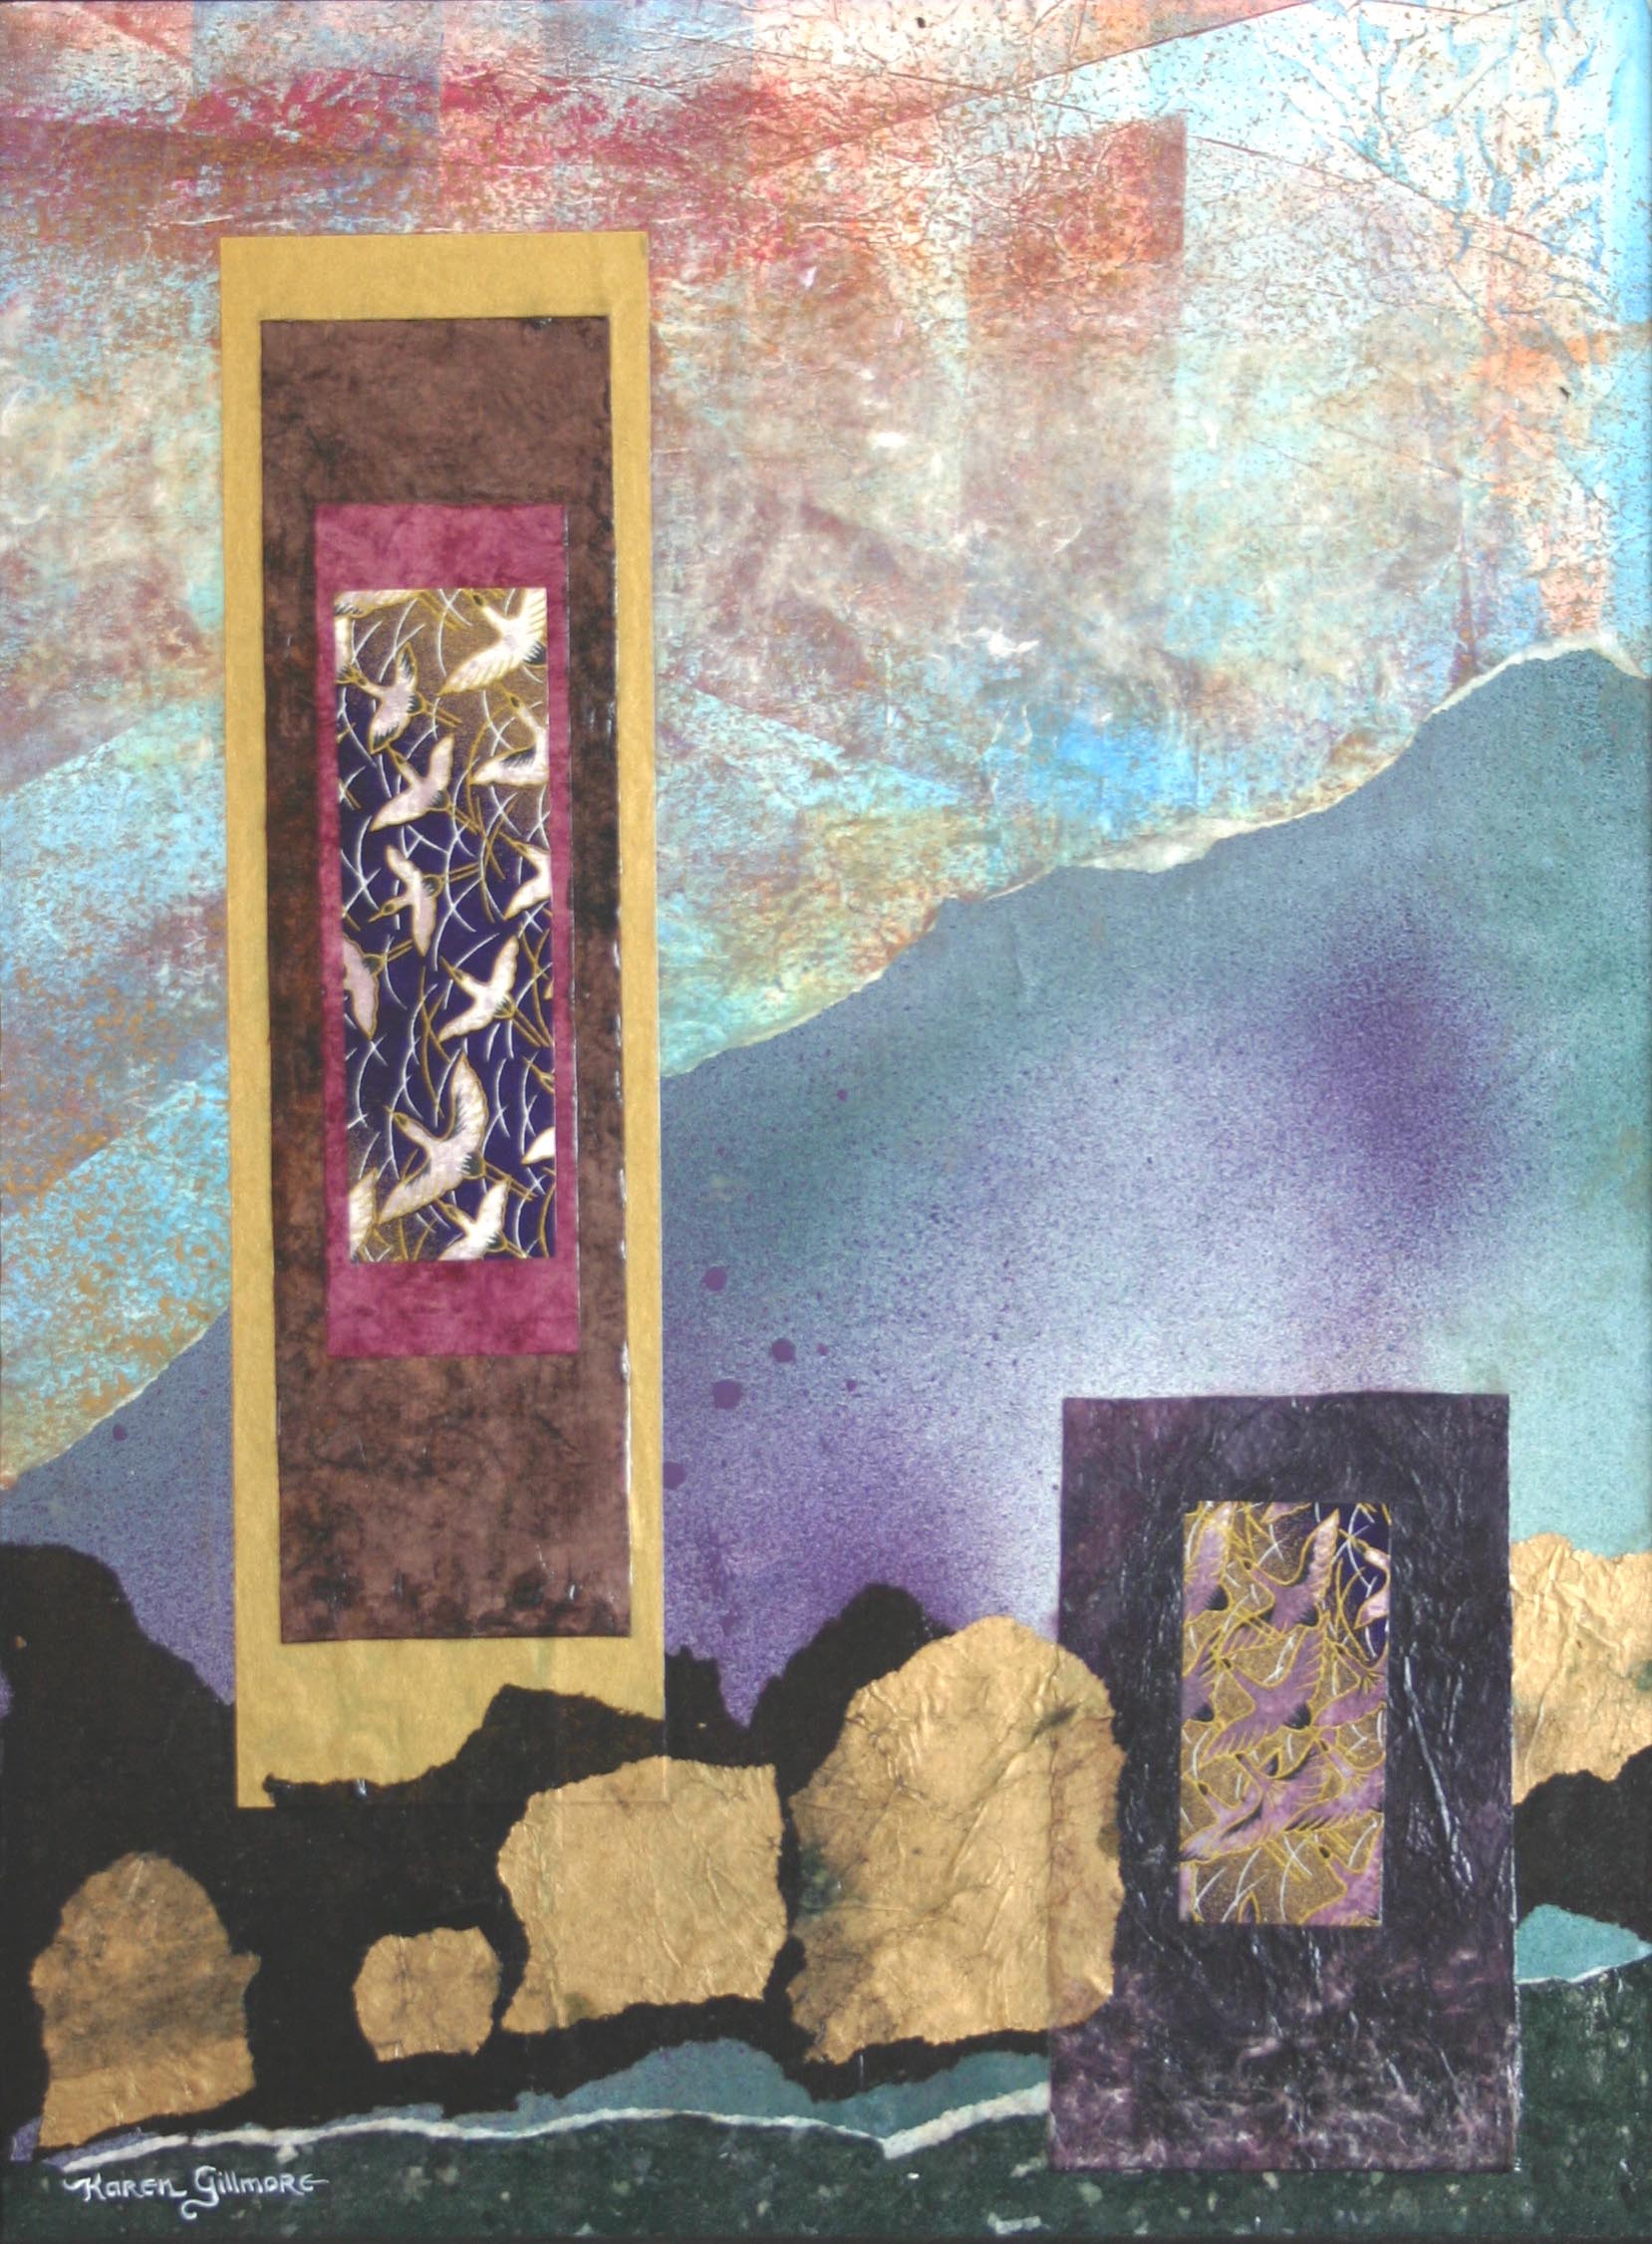
Portals — my own hand decorated papers, some gold tissue paper, and some beautiful Japanese gift-wrap.
It’s fun to further embellish your collage after you glue it. The collage below was embroidered on the white part of the paper with thread (you can just barely see it here), and I often go back in and add paint or pencil in spots, or sometimes glaze over the whole thing with a layer of slightly tinted acrylic medium to bring it all together.

Magic and Mist — I made this from bits of linocut proofs and some paper that I rolled leftover ink onto after a printmaking session.
Recycle your art work! Every artist has a pile of “failed” paintings, test sheets, and rags with paint all over them. Printmakers in particular always end up with lots of proofs. Don’t throw them away! Paint and paper are expensive, and you meant them to be paintings anyway, right? It’s incredibly liberating to tear up a painting that was causing you agonizing waves of grief every time you looked at it, and reduce it to little bits of pretty colour that you can glue back together in another form. Have a paper-ripping party! (Can you tell I really like doing this?) If you don’t like the raw ripped paper edges, colour them with coloured or metallic pens; in the collage below, I used a gold metallic pen. Shiny!

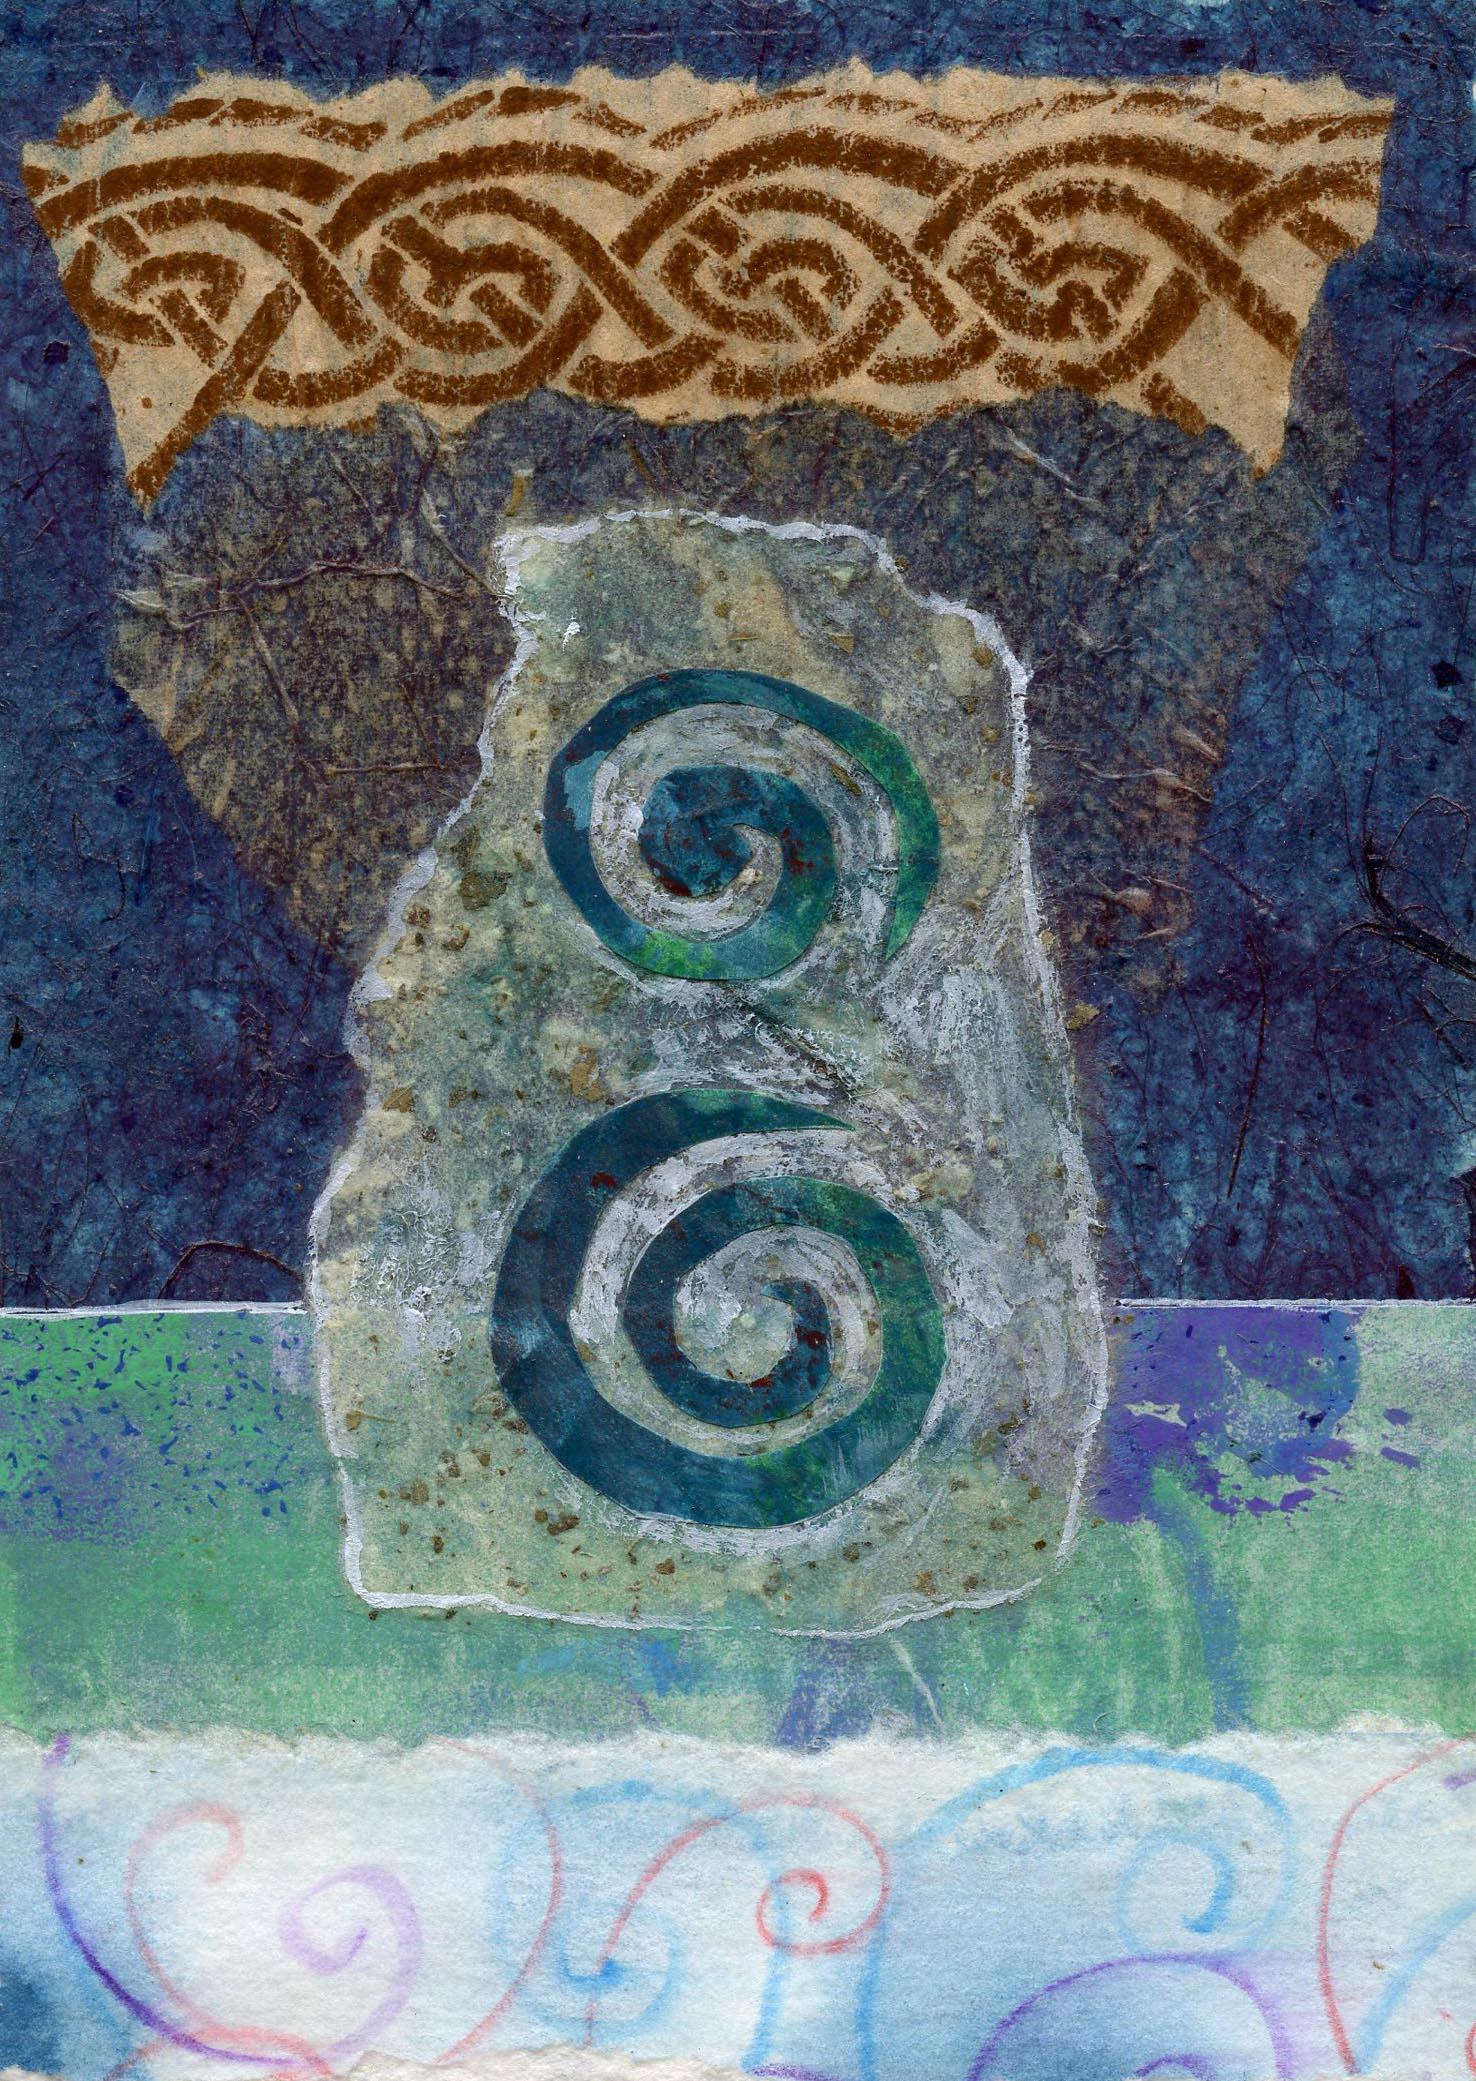
Stone Wisdom — hand decorated and printed papers, handmade paper
Hand-decorate your own paper: Haven’t got that exact colour you need for the collage? Paint a series of sheets with solid colours in your chosen medium, then you’ve always got the right colour to hand. Try some marbling, or make some linocut or potato stamps and make printed patterns. Or just throw paint at the paper, or pour it on!
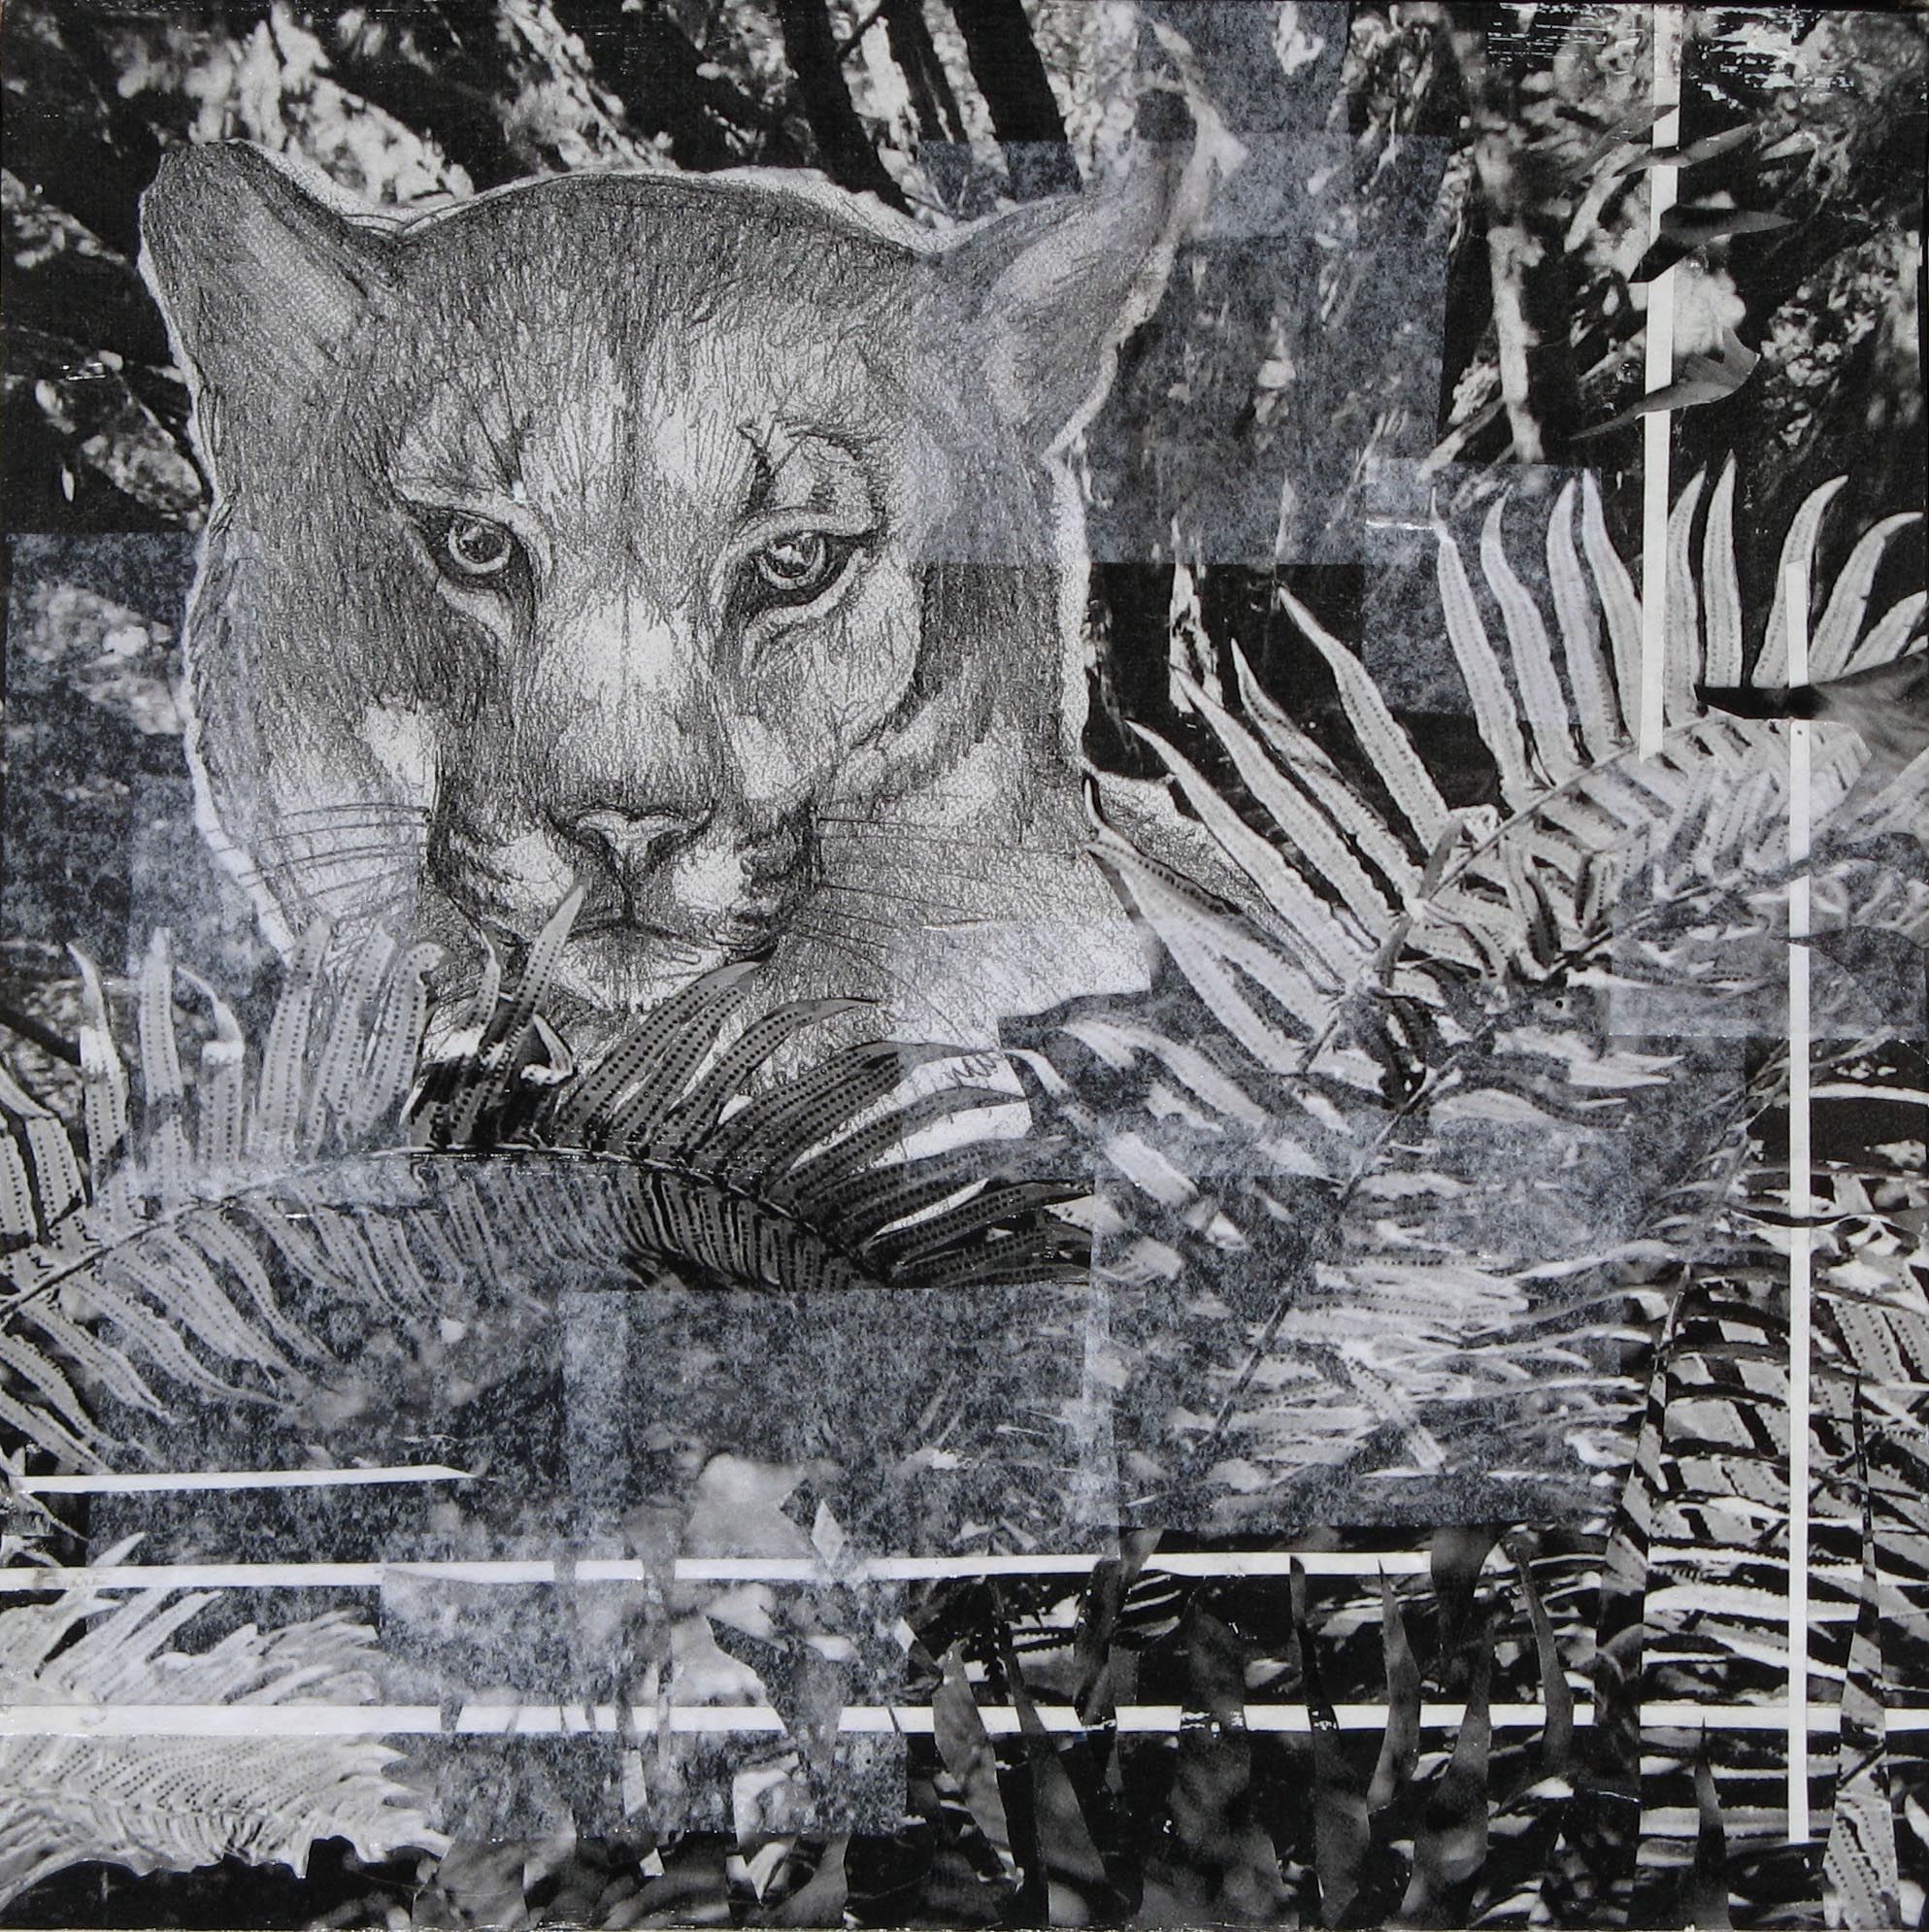
Cougar in the Ferns — made from photocopies of my sketch of a cougar and some photos I took of ferns. I was going to glaze it with paints, but I liked it so much in black and white I left it.
Photos: Using your own photos is much more personal than cutting images out of magazines. If you don’t want to use the actual photo (and there are often possible fading issues here anyway), make a photocopy of it. Black and white photocopies can be particularly compelling, and you can always add colour back in with paint. You can also photocopy your own artwork, such as sketches in this way. Either glue these directly into your collage, or use a transfer method on the photocopy.
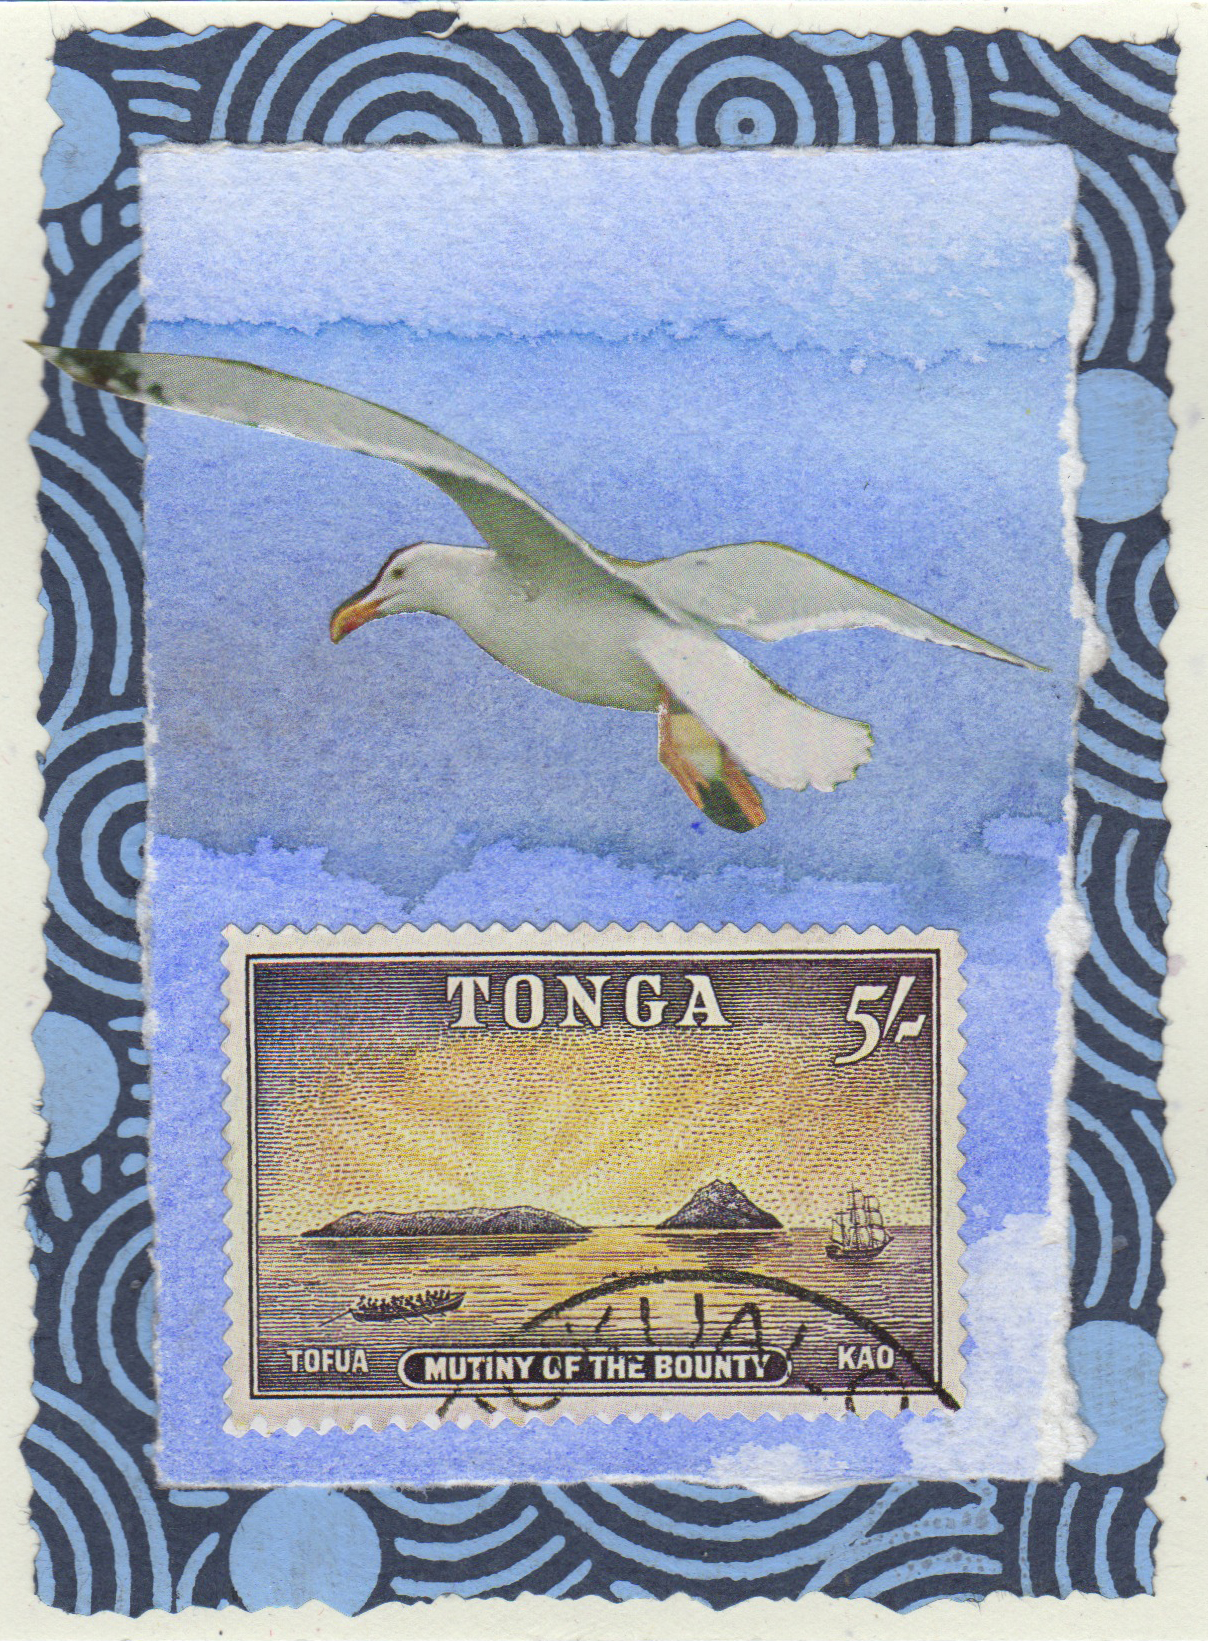
Tonga — stamp, Japanese gift wrap, magazine photo, hand decorated paper
Text: newspapers, old books, letters, spreadsheets — these can be used in an aesthetic way or for their actual content. I usually try to see any text or markings first as just part of the way the thing looks, as if they were in a foreign language, unless I am actually using them as the theme of the piece, as I sometimes do with fortune cookie fortunes or book clippings. Sometimes I add text after the main picture is composed to give an ironic, humorous, or mysterious twist to the subject matter.
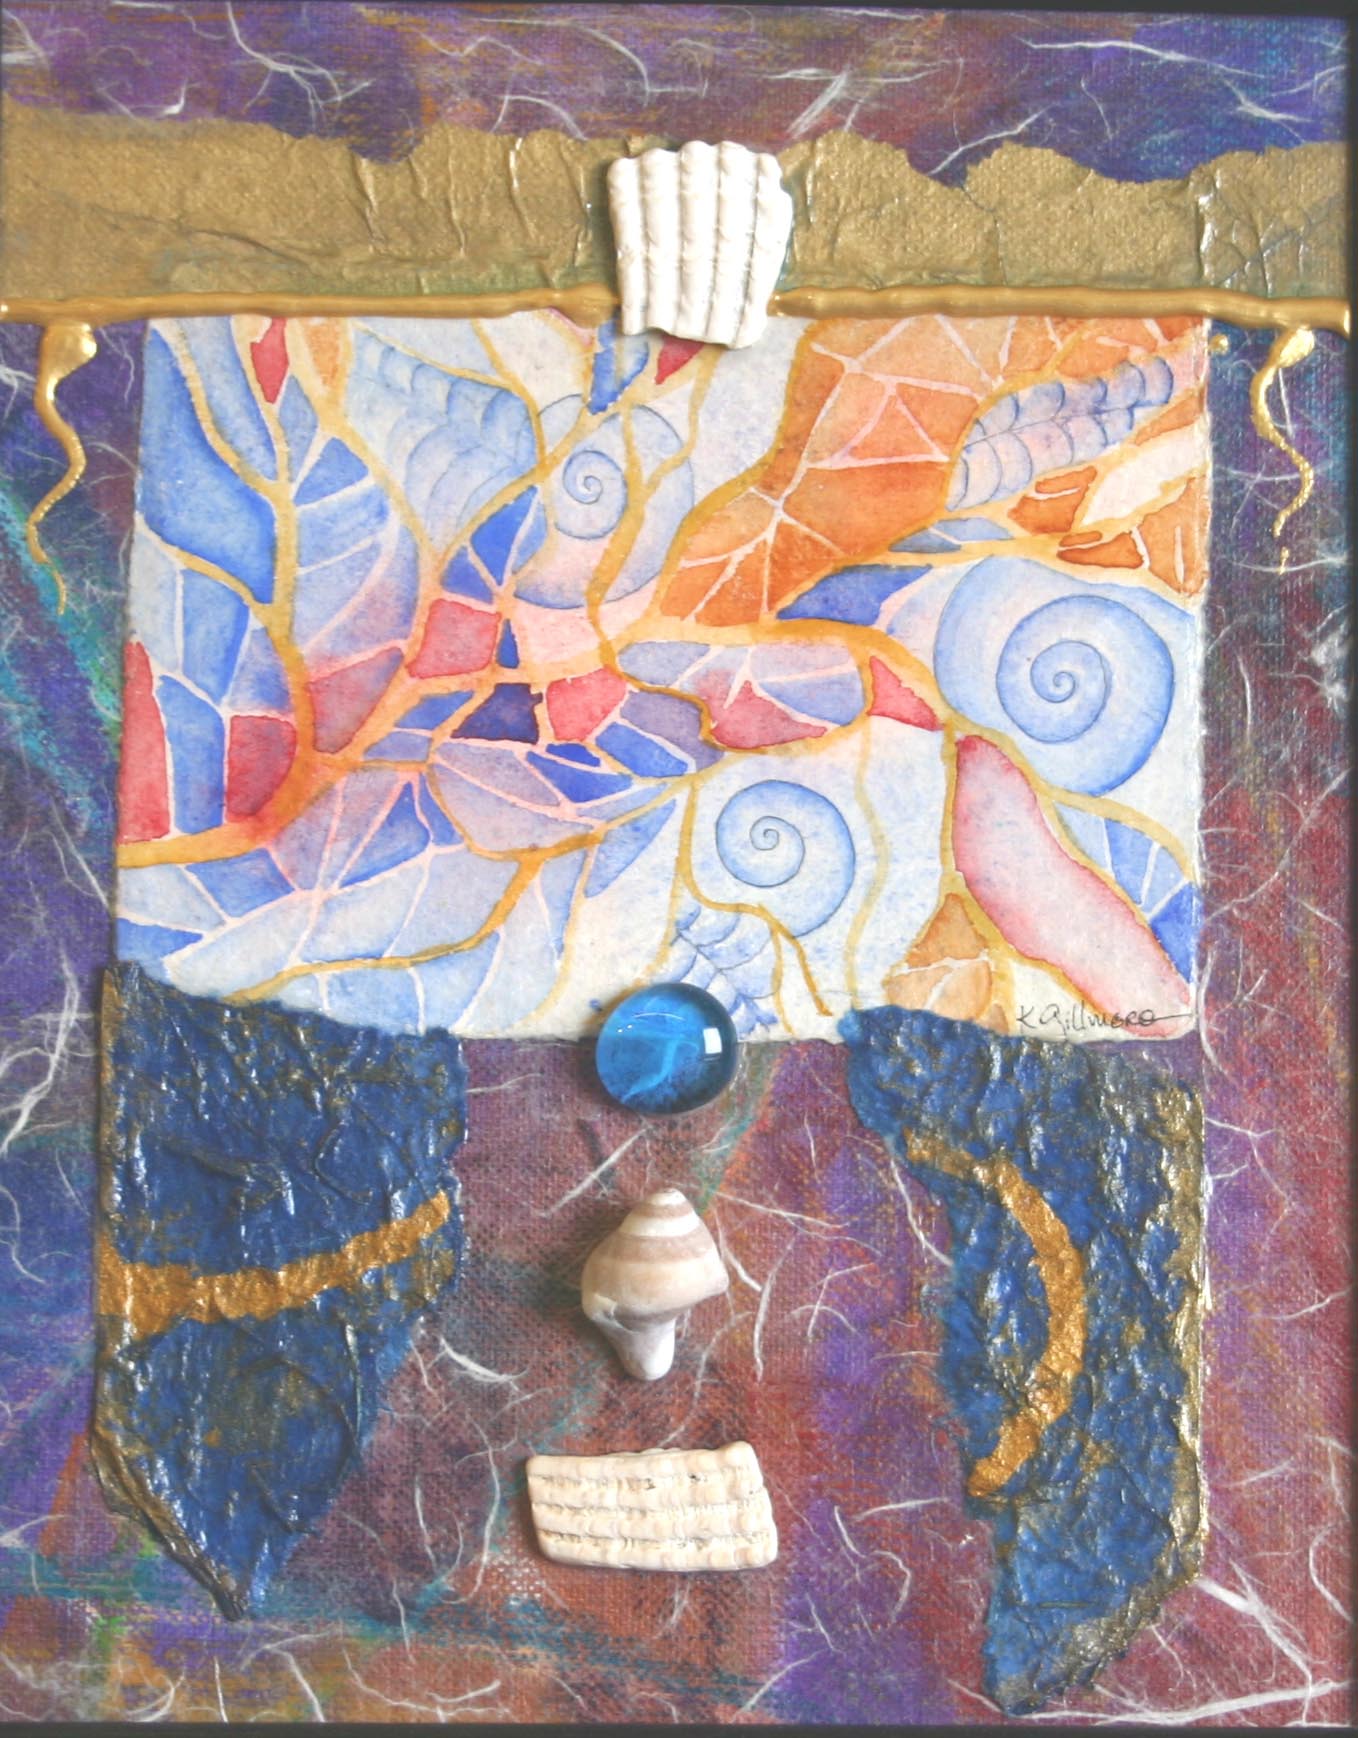
Fossil Sea — a tiny watercolour painting set into hand-decoarated, very textured handmade paper, with the additions of real seashells and a piece of glass.
You can also add three-dimensional objects to a collage, as long as it isn’t too heavy for the support and the type of glue you are using. Here are some ideas: Old jewelry, trinkets, souvenirs; fabric scraps or trim, perhaps from a treasured but defunct item; strange bits of hardware or wood that you think are cool or beautiful; natural items from last summer’s vacation or your backyard: shells, driftwood, rocks; string, wire, thread, fur… If you think the glue won’t hold it, drill some holes in your support and sew or wire it on.
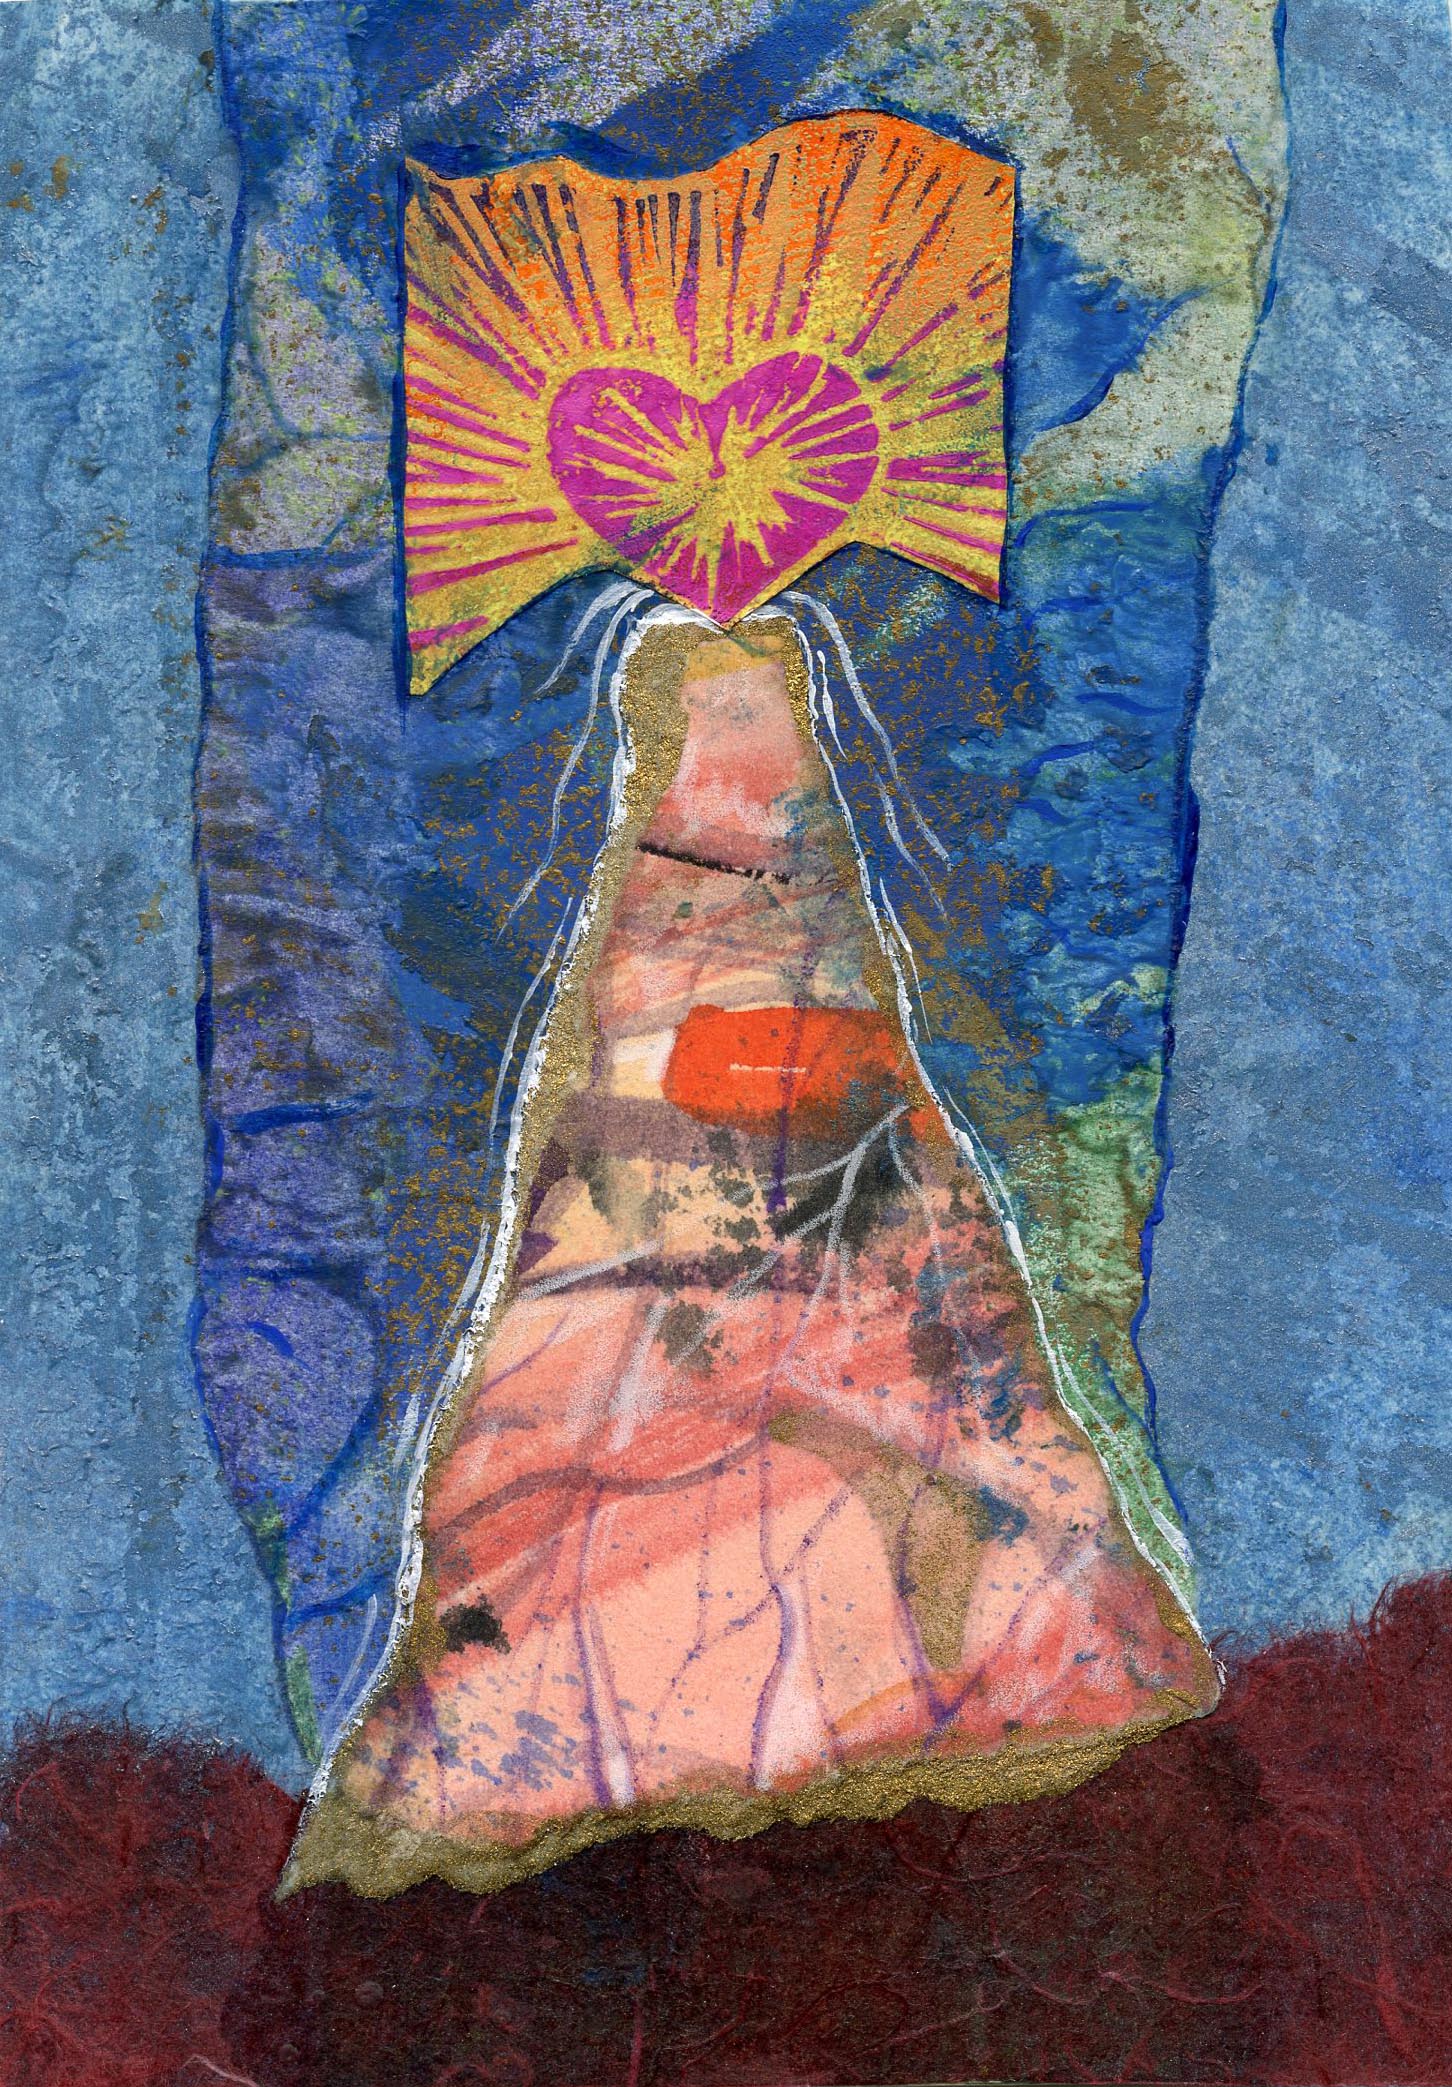
Heart of Light — hand decorated and printed papers, handmade paper
The most rewarding thing to me about doing collage is making connections between seemingly unrelated materials and melding them into an aesthetic (and sturdy) whole. I try to see each piece as an object on its own merit; the colour, the potential shapes it could be torn or cut into, its texture, and put them together as if I were making a painting.
Elemental Stone — hand-decorated and printed papers
One last helpful hint: don’t start gluing until you have at least most of your pieces selected and laid out in the layers you want to add them! Then take each layer and set it aside in a separate place, so that you can begin with glueing the first layer. If it is an especially complicated piece, take a photo of the layout or sketch it before you disassemble it.
Happy collaging! I hope I’ve inspired you to try it, if you haven’t already, and if you have, I hope this information will prove useful for new collages. If you have any questions about collage, please ask them in the comments, and I’ll try to answer them!

In university one of our exercises was to take a charcoal sketch we’d done of a landscape, and collage over it with a single colour of card. It was pretty cool the effect you could create with just two tones of material collaged one over the other.
LikeLike
That’s a great exercise! I’ll have to try that sometime — there are so many ways to use collage, and I’m always glad to get new ideas. Thanks for that one!
LikeLike
I love collaging! This is one at arena I can excell at. I made my wedding invites myself with this technique. I like to use all the different media like you have done. Thanks for the new ideas also. This was a great art lesson!
LikeLike
I’m glad you enjoyed it and found it useful. Those must have been amazing wedding invitations! Have you posted any of your collages? You could leave a link here if you have, I’d love to see them.
LikeLike
Thanks! No posts about them yet, but I will remember the topic for a future post. Thanks, muse! Haha!
LikeLike
*grin*
LikeLike
If you work on a stretched canvas, do you do anything to prepare the canvas first or do you use PVA to directly adhere pieces of paper to the canvas?
LikeLike
Hi Daniel, if I were using raw canvas I’d want it to already be prepared in some way, just to minimize uneven buckling. Either a coat of gesso, or acrylic medium (matte or gloss), or even the PVA itself, evenly coated and let dry — two or three coats is even better. I don’t often collage on canvas (I prefer a solid board), but when I do I usually use pre-stretched and primed canvas, which doesn’t need any further preparation. If you are incorporating a bit of collage into a painting, and want the raw-canvas look in parts, use one some matte medium to prime the canvas.
LikeLike
I’ve done a collage with magazine clippings on watercolor paper. Now i’m trying to figure out how to protect it. I’m trying to avoid material that will make the piece crack, curl, become see through, or become sticky. Any suggestions?
LikeLike
It depends on what you used as glue. I usually use plain old acrylic medium for both glue and protective coating; matte or gloss or a mixture for a satin finish. You can also buy spray acrylic varnish, which will make a lighter coat and shouldn’t affect the paper. If you’ve used rubber cement or similar for a glue, you may have trouble over time with the issues you’ve mentioned, but any good white glue (PVA) or acrylic medium should not be a problem with these coatings. If you’ve used wheat or rice paste, it’s sensitive to moisture, so I would say use the spray acrylic over that.
I sometimes mount works on paper, such as collage or even watercolour paintings, on cradled boards, which are a thin board mounted on a stabilizing wooden frame (many art stores carry them these days). I use the acrylic medium or PVA for that, then coat with acrylic medium or spray acrylic to protect it. These can be displayed without framing, and being both creative about my laziness and a famous cheapskate, I really like this option!
LikeLike
I have lots of designs that I colored using markers. Now i am cutting them up and glueing them on to pages I cut out of discarded children’s picture books. They are too large for me to put in plastic sleeves so I need a way to preserve them. I think that using a wet sealant would cause the marker to run. Do you have any suggestions? I’m new to collage and am thoroughly enjoying using my coloring to create new art pieces. I am also pleased about how well they are turning out and would like to preserve them. Unfortunately due to my limited finances, framing them is not an option.
LikeLike
Hi Genella, that sounds like fun! First, depending on the marker you are using, it might not run — try doing some test swatches with different colours and see if diluted white glue or acrylic medium will do the trick. If not, get some spray fixative from the art store; Krylon is the brand I use, and I usually buy the workable fixative, because I can still go back and make changes if I want to. Be sure to use this outdoors, and leave it to dry there; the fumes are nasty. When I was a kid, we used to use hair-spray for the same purpose because it was cheap, but I don’t know if today’s formulations work the same. I’d also use that outdoors. Do test swatches whichever one you try, because colours are sometimes changed by solvent-based fixatives. Let me know how your tests work out, and good luck!
PS, another thought — you can buy clear plastic sleeves for artwork in many sizes, and they are inexpensive. Check your local art store or online for options.
LikeLike
These are the kind of “crystal” bags I mean — just using my local art store for reference, because they have a good catalogue. They do ship, if these interest you.
https://store.opusartsupplies.com/sagro/storefront/store.php?mode=browsecategory&category=3397
LikeLike
Thank you for your suggestions. I’ve used hair spray on chalk pastel paintings. But I will look for sleeves.
LikeLiked by 1 person